|
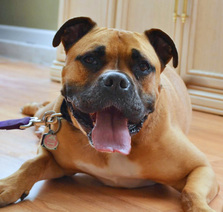
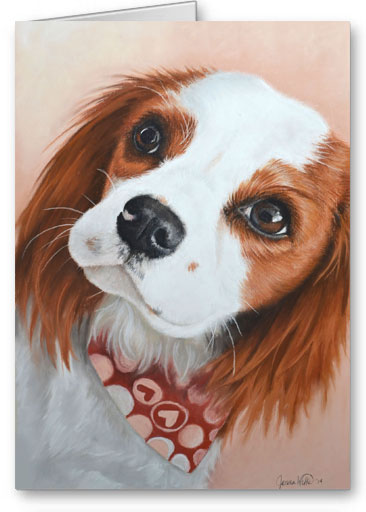
No one knows your dog better than you do. No one. You live with her, you watch her sleep, and eat, and sleep some more. You watch her frolic in the yard and then laugh was she rolls in that one spot she likes where the grass is extra soft. You know her personality inside and out, so you know what expressions capture what makes your dog your dog. Part of the dilemma I face with any pet portrait is choosing the right photo reference.While the best photos will always render the most detailed custom pet portraits, I don't know your pet the way you do. I can't search through hundreds of images and choose the one photo that depicts your dog the way you know her. One of the most important things in any custom pet portrait is to choose an image that really shows your pet's personality. Lola was a perfect example. Because this was a local commissioned pet portrait, I was able to do a photo shoot with Lola at her home. We struggled to get her just at the right moment to get that "I'm excited" happy face. In other words, I needed her ears up. (When a dog's ear are down or back in a photo, they often look scared or sheepish and it does not translate well into a painting. ) Out of almost 200 photos, these 3 were the only ones I could find in which Lola's facial expression depicted her as the excited Lola that laid in front of my camera lens:
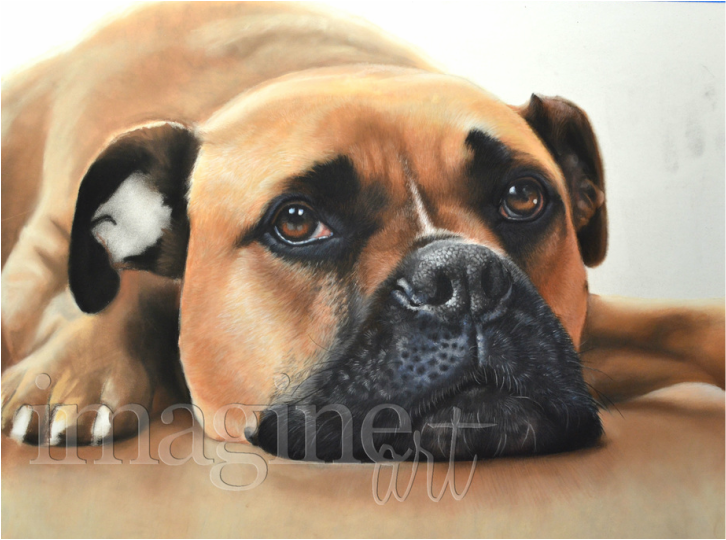
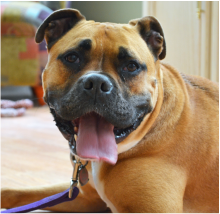
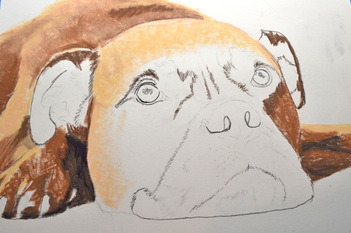
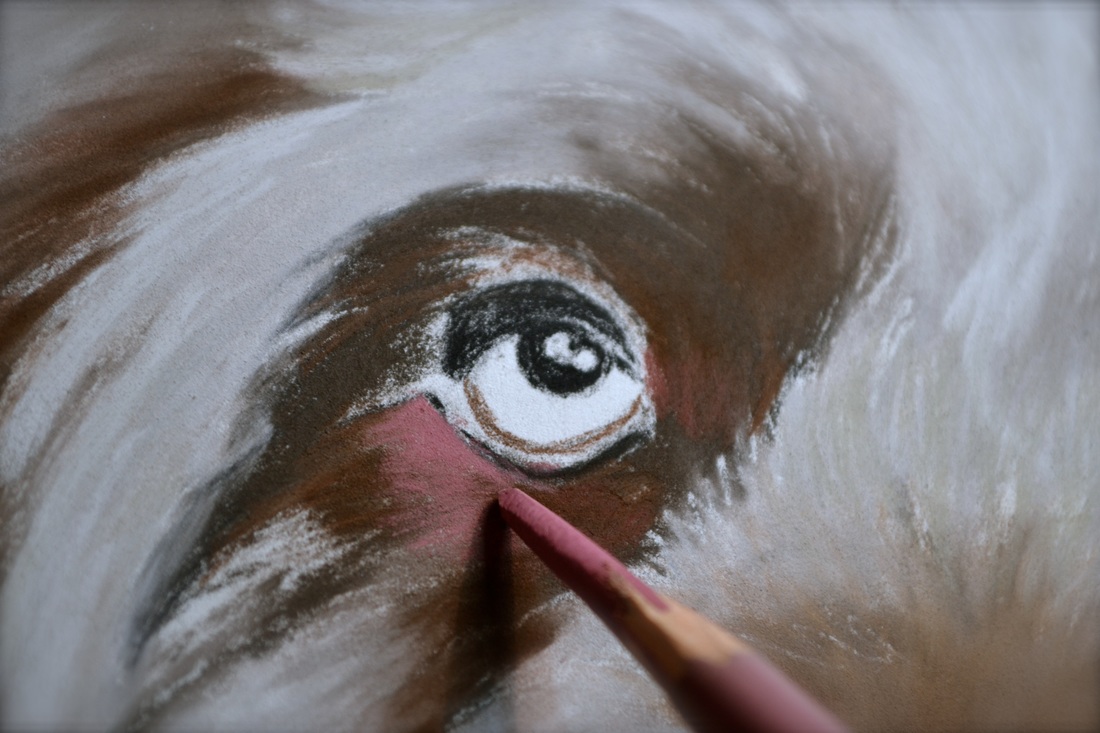
To me, all three of these photos would have made fantastic dog portraits. She's looking straight at me, ears up, even smiling! But Lola's mommy, April, wasn't thrilled with any of them. They were "OK" but I could tell none of them really stood out to her. Before I wrapped up our shooting session, I let April paw through the shots on my camera. She gasped "AHA!" and I immediately knew we found the one. 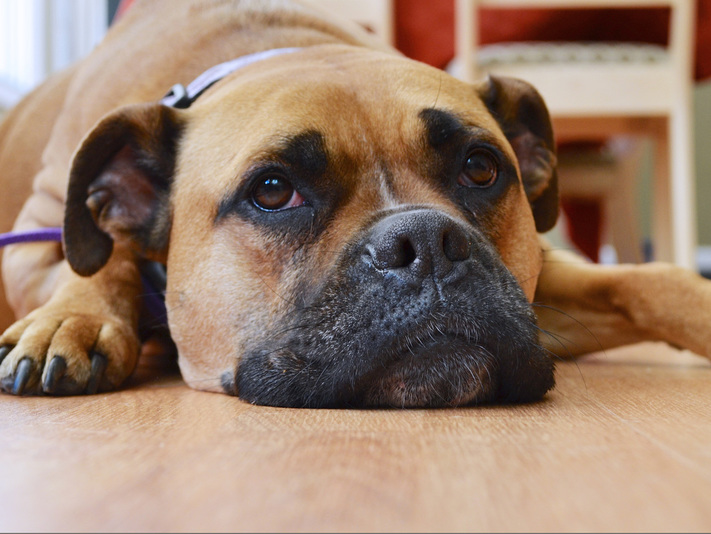 It was a new concept for me to approach a pet portrait that wasn't gleaming with happiness and excitement. This photo of Lola was one of exhaustion and boredom. Is this really what April wanted hanging on her wall? Yes, it was. April explained that this photo captured Lola in every way. Even though she has a spunky happy-go-lucky side, most of Lola's days are just spent lounging on the couch, moping around the house, and giving her best "feel bad for me" sad eyes. I couldn't argue. I don't live with Lola, so I had to rely on April's gut reaction. Her love of the photo was undeniable - and so it was chosen. The Portrait Begins...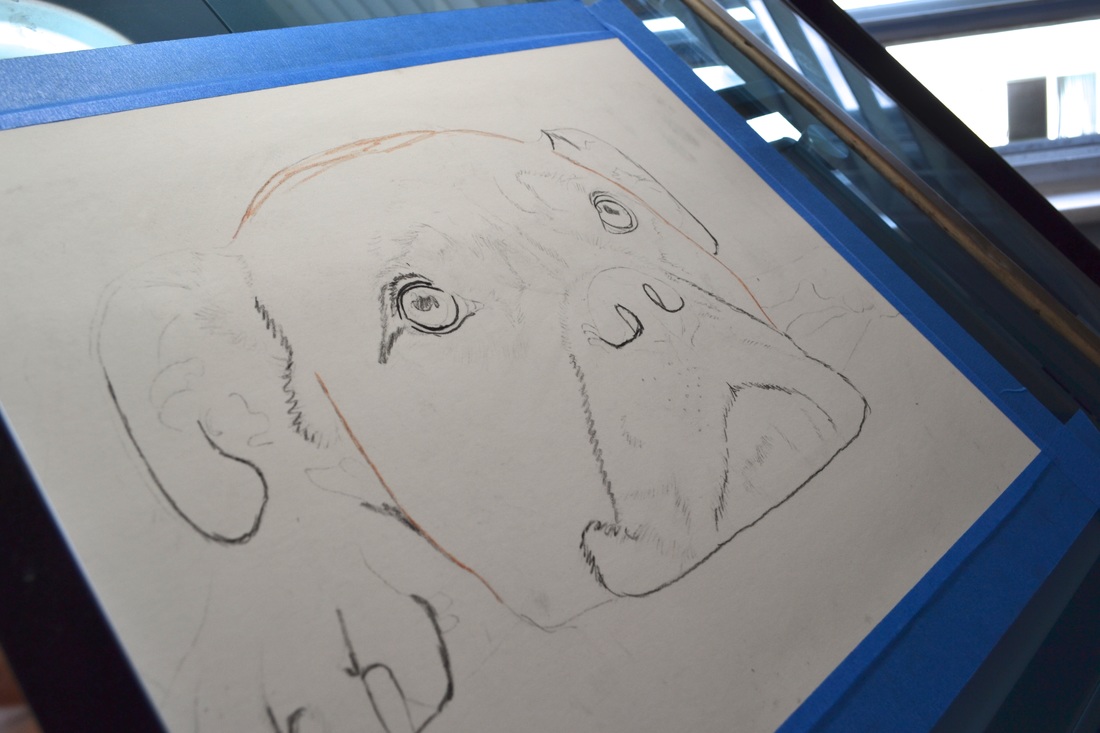 Lola's expression translated immediately into the initial portrait drawing. Not even five minutes into the process and she's already giving me "sad eyes". Oh boy...
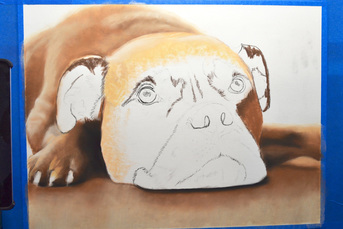
Above, my first pastel color gets scribbled into place. I always start with the highlights, and then the darkest darks, and then hit all the shades in between. As you can see below, when I say "scribble" I really mean it. Nothing fancy here, folks! 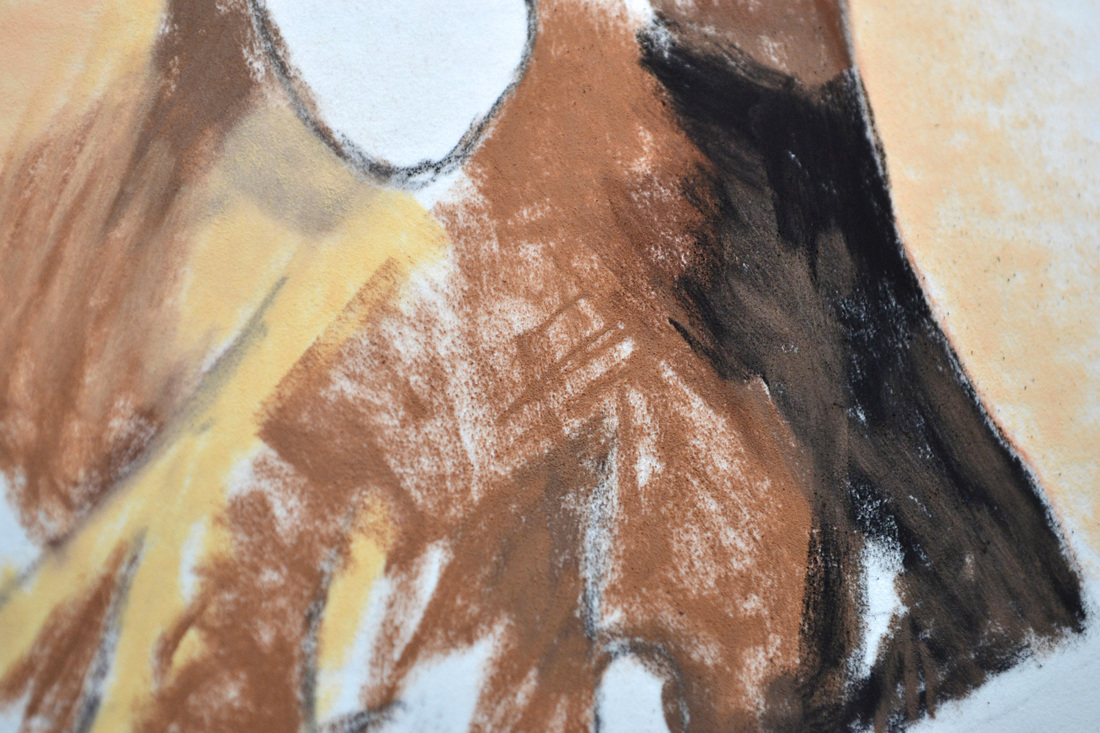 Below, after all the larger (less detailed) areas were scribbled in, I blended the pastel to give subtle gradients of color. Had to mask all the evidence of scribbling ;) 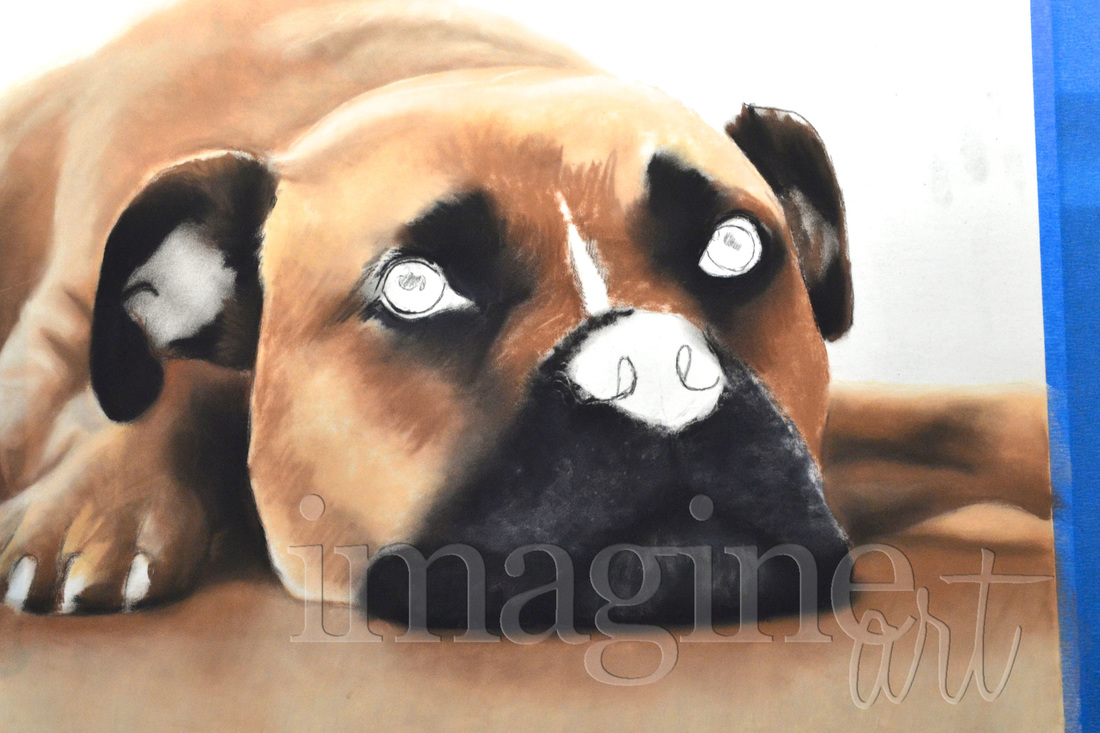
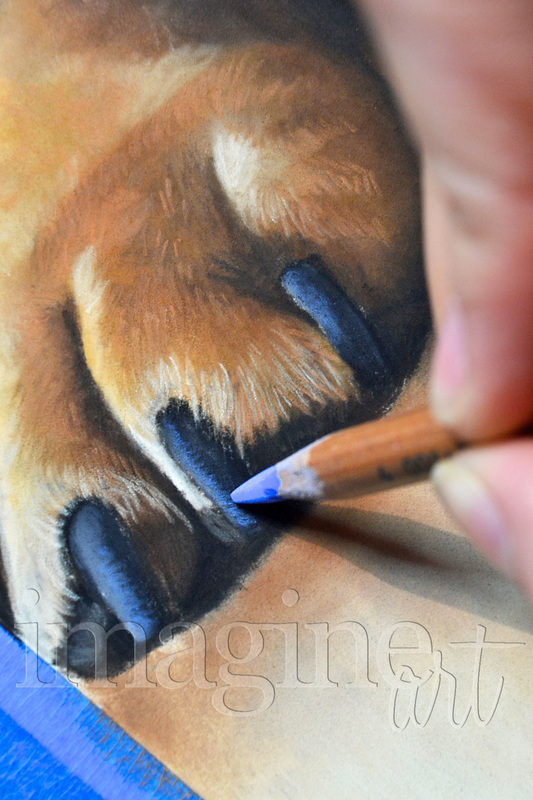
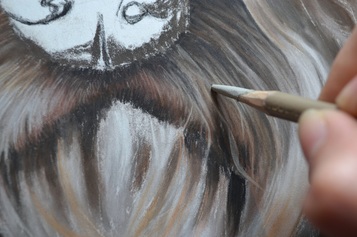
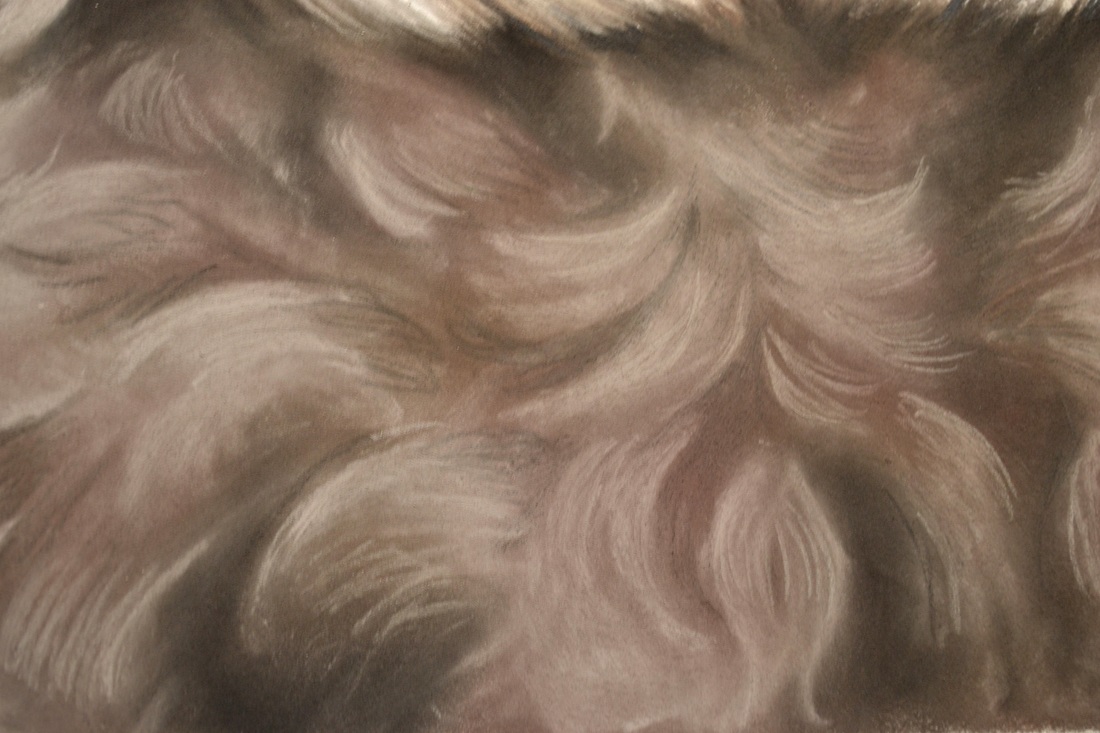
Onto the nose. Because of this portrait's size, I was able to get really detailed with the texture in Lola's nose. This required many layers of pastel, as you'll see in the final portrait stages... 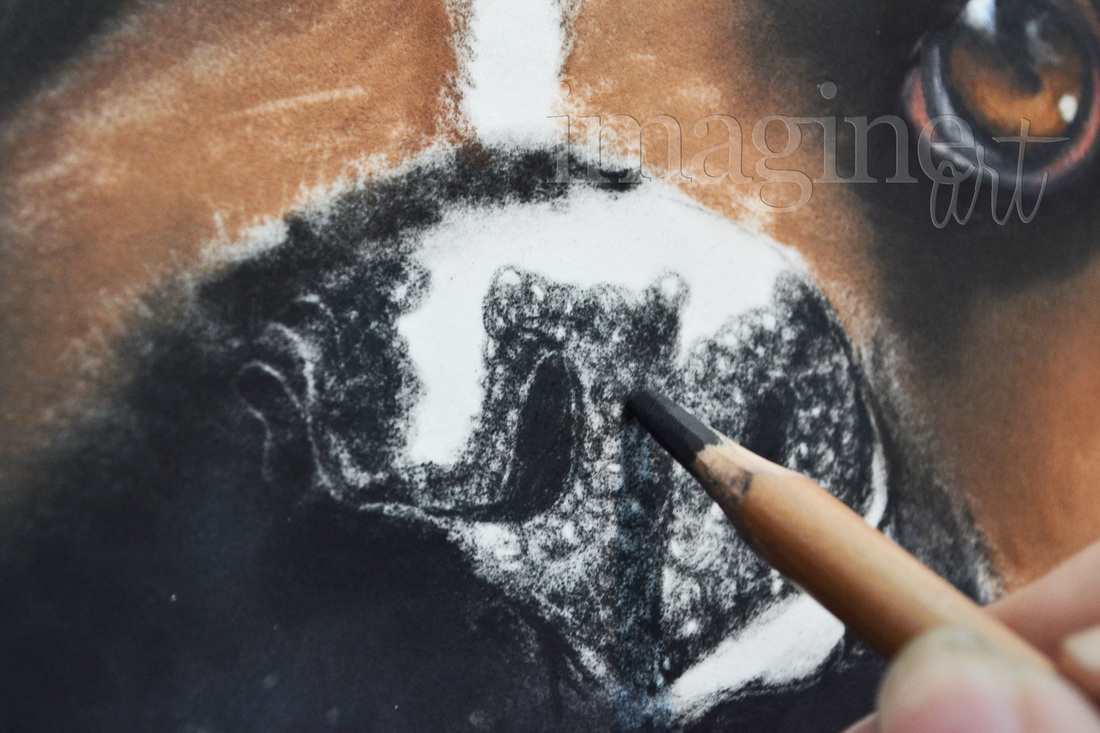 Once the basics are established (eyes, nose, snout) my favorite step begins! Adding the coat texture is a long, tedious process. However along with the monotany of billions upon billions of tiny hair strokes, theres an excitement building inside me - I love watching the portrait come alive with color! 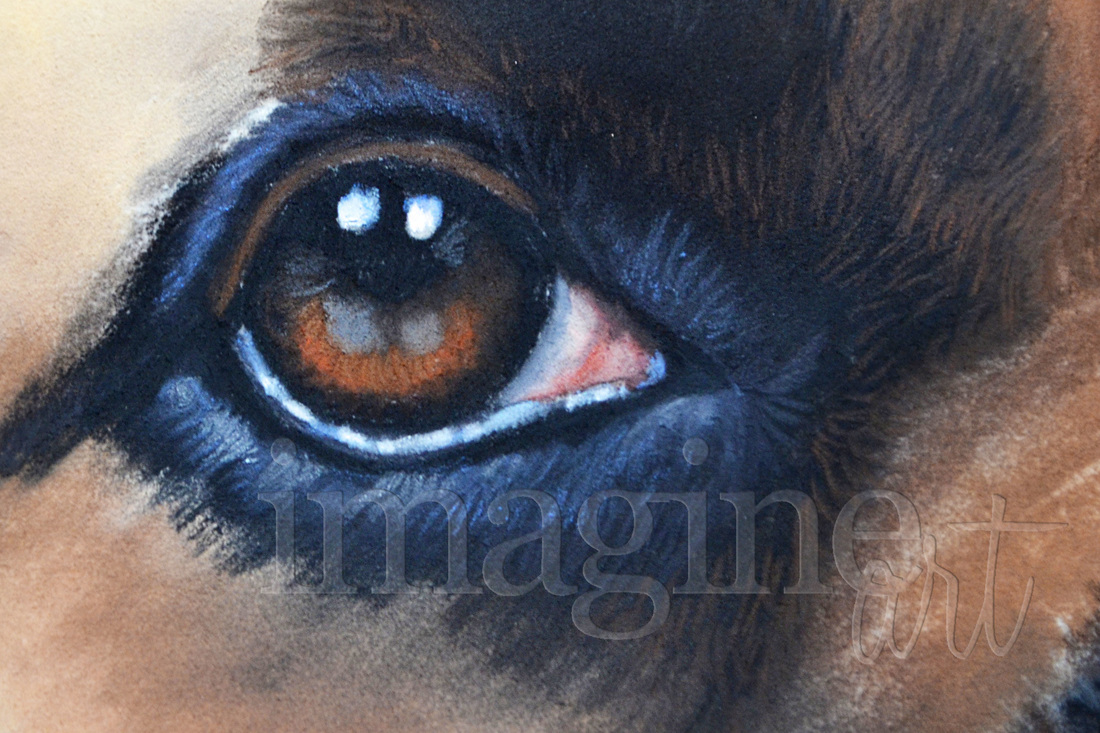 As you can see above and below, there's a lot of bright layers of color that I used to achieve the neutral tone of Lola's hair. 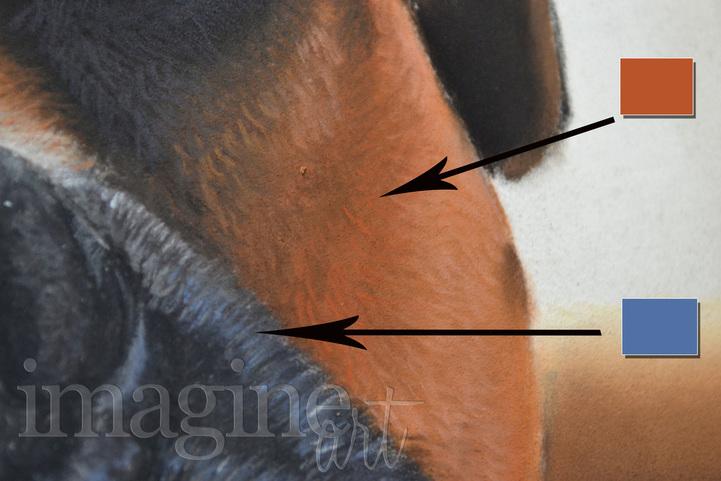 And the hair strokes continue... 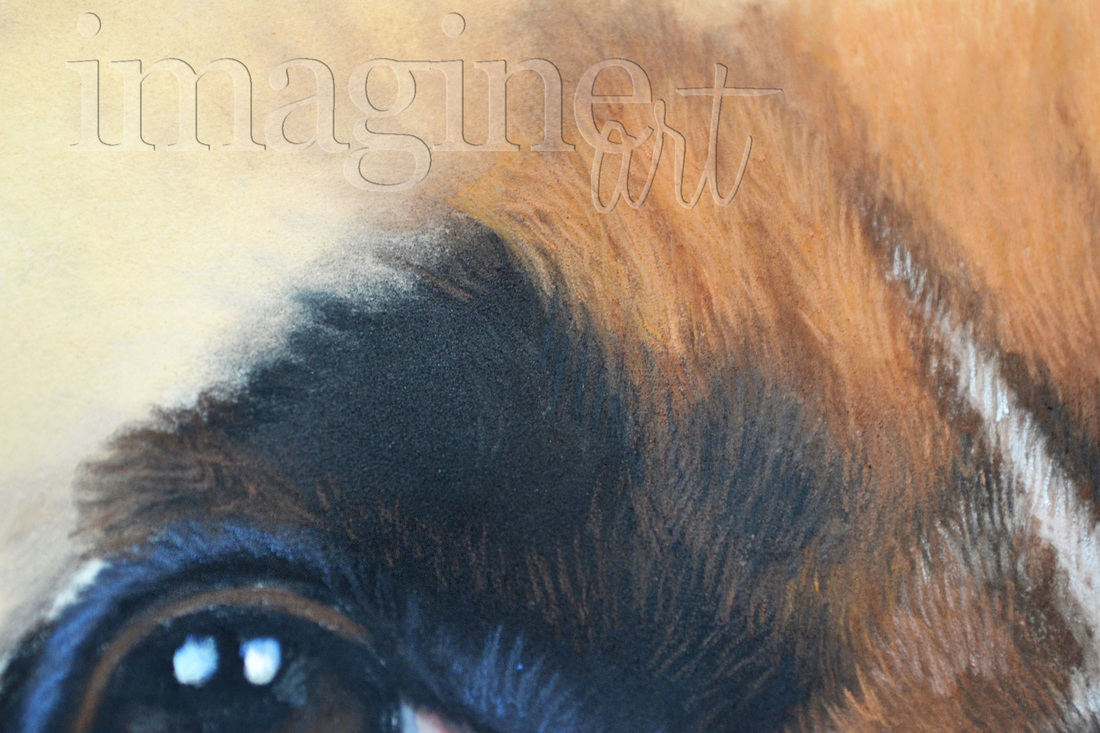
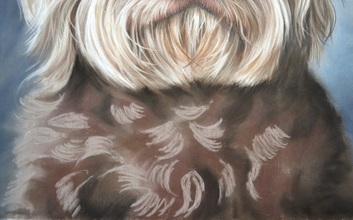
 Here you can see the juxtaposition of her face - almost completely filled in with hair strokes - beside the remainder of her body which has yet to receive any detail beyond my blurred scribbles. I'm not sure why but I tend to leave things like ears for one of the last steps to the portrait... 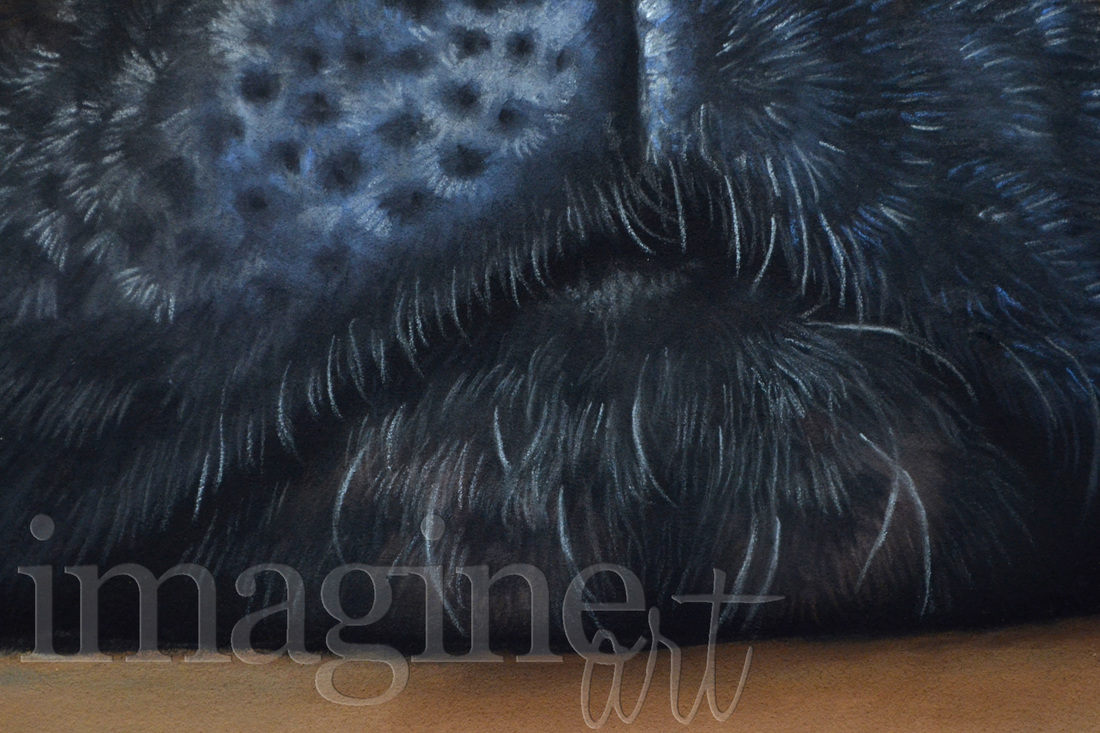 Lola's snout was quite an endeavor. As you can see in the image above, there were many shades of blue, grey, and even purple needed to achieve the appearance of texture. Additionally, the white hair strokes layered over top required different shades of grey and white to give the illusion that some were popping out more than others.
And Voi la! A "Lola" comes to life! 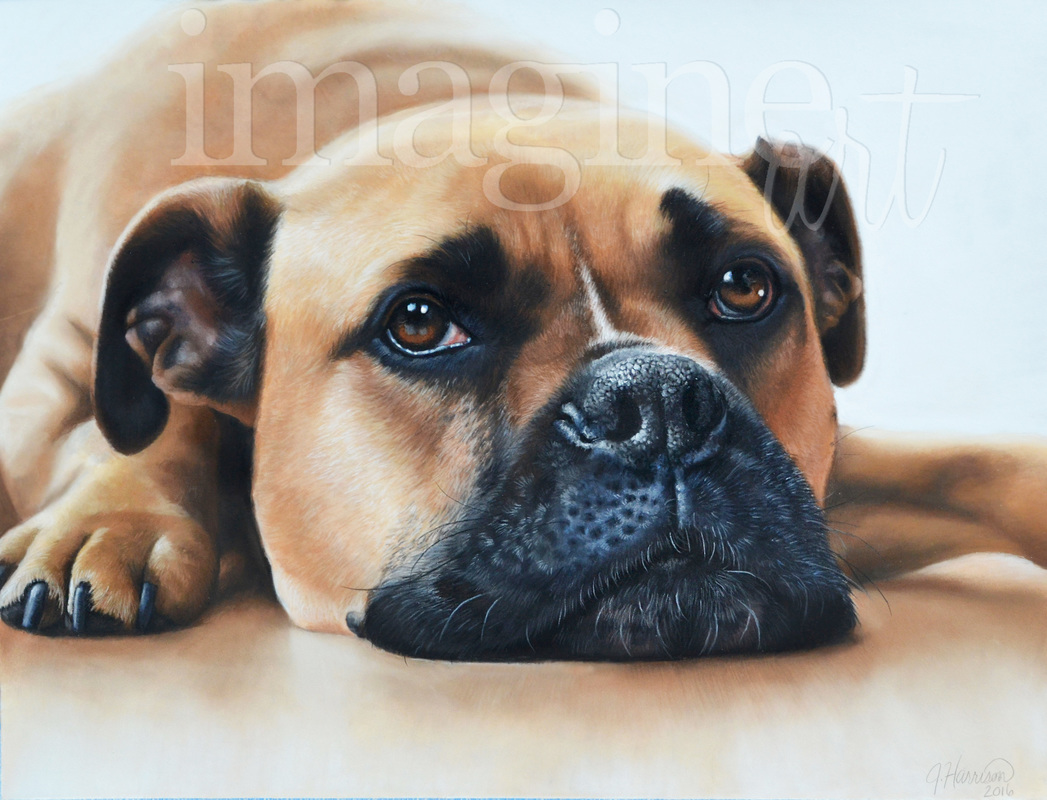 When April finally held Lola's portrait in her hands, she kept saying "She's beautiful" as opposed to "it's beautiful."
In those few words, I learned a really valuable lesson: I can spend any number of endless hours perfecting a pet portrait to be as photorealistic as possible and in the end it will look just like your photo. But if that photo doesn't depict your dog's true personality, that portrait is just "a portrait" of "a dog". So be sure to choose a reference photo that shows who your dog really is.
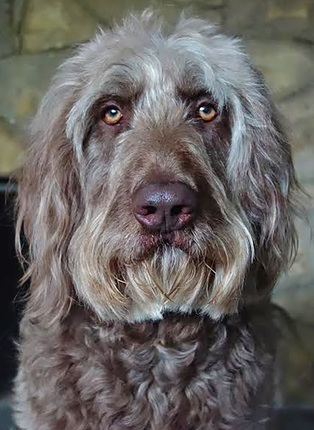
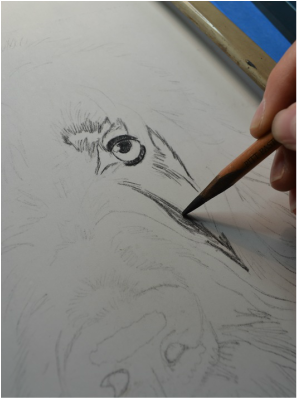
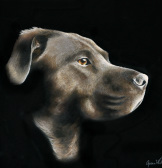
I start every portrait differently, depending on the colors, hues, facial structure, lighting, and texture necessary. Each subject will require a certain number of layers of color to achieve that super realistic look. With Harris, I started by defining all the dark areas of his face.
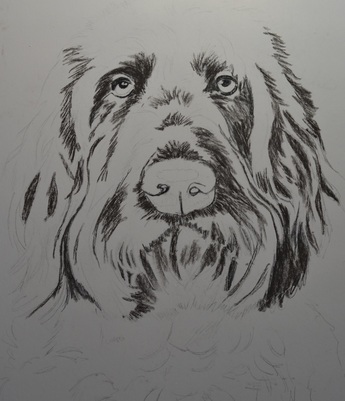
I then moved up one step lighter and established all of the dark (but slightly lighter) areas. 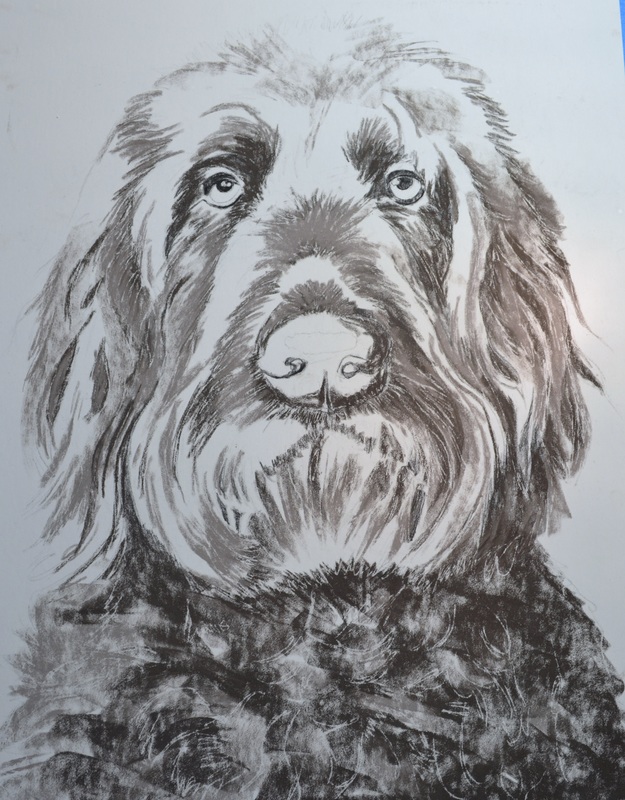 Working my way up from dark to light, I proceeded to define all the mid tones and highlighted areas of his face. While most of Harris' hair appears to be monochromatic, it has undertones of warm and cool browns, so the first layer is where I put those down. They become softer as the portrait progresses. 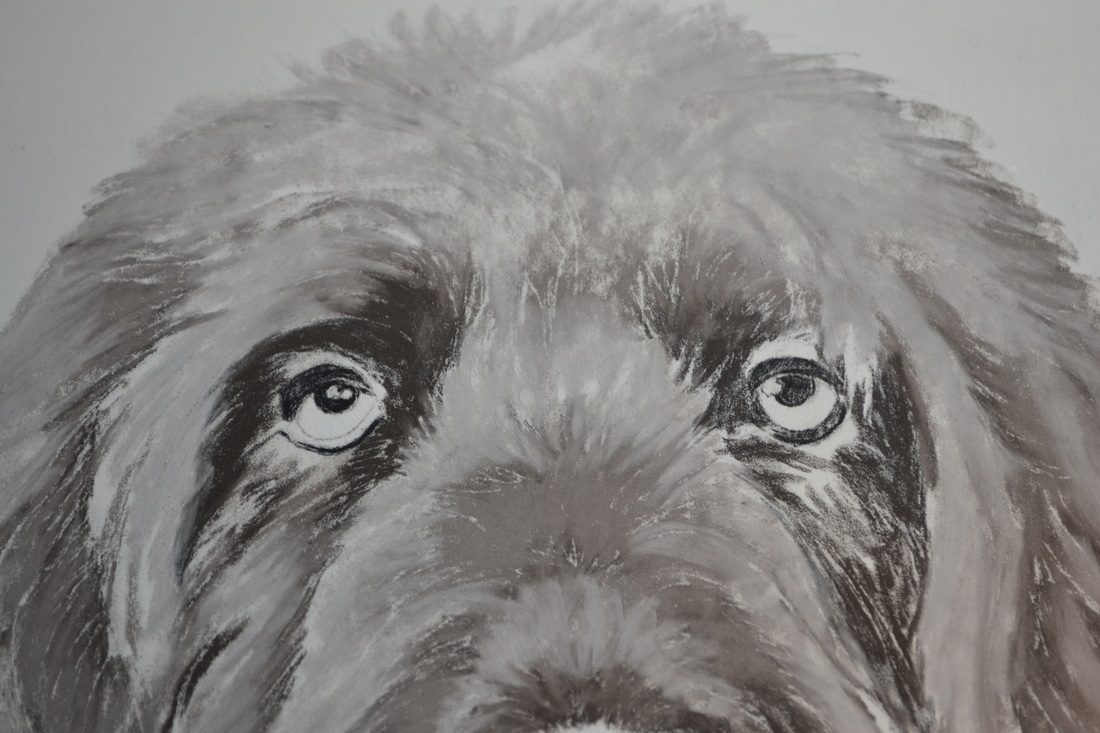 You can also see in the photo below where I began to blend and soften certain areas. Notice that I have left his eyes and nose completely blank? 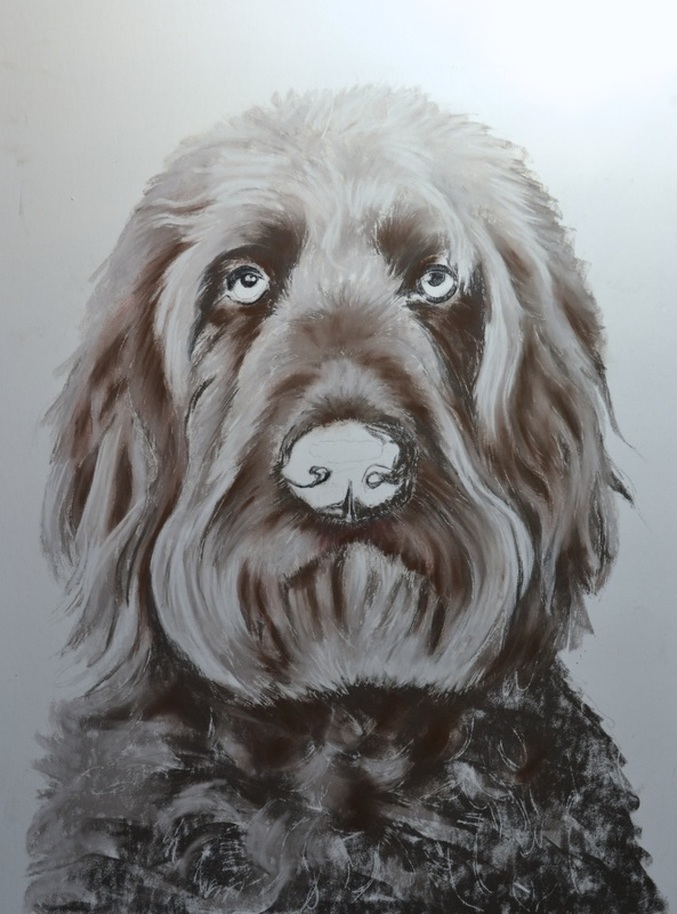 All of the base layer colors give me a sort of map to work from. It helps me later on in the portrait when I'm more focused on fine details so that I'm not concerned with where exactly that shadow falls on his face, or what direction that tuft of fur moves in.
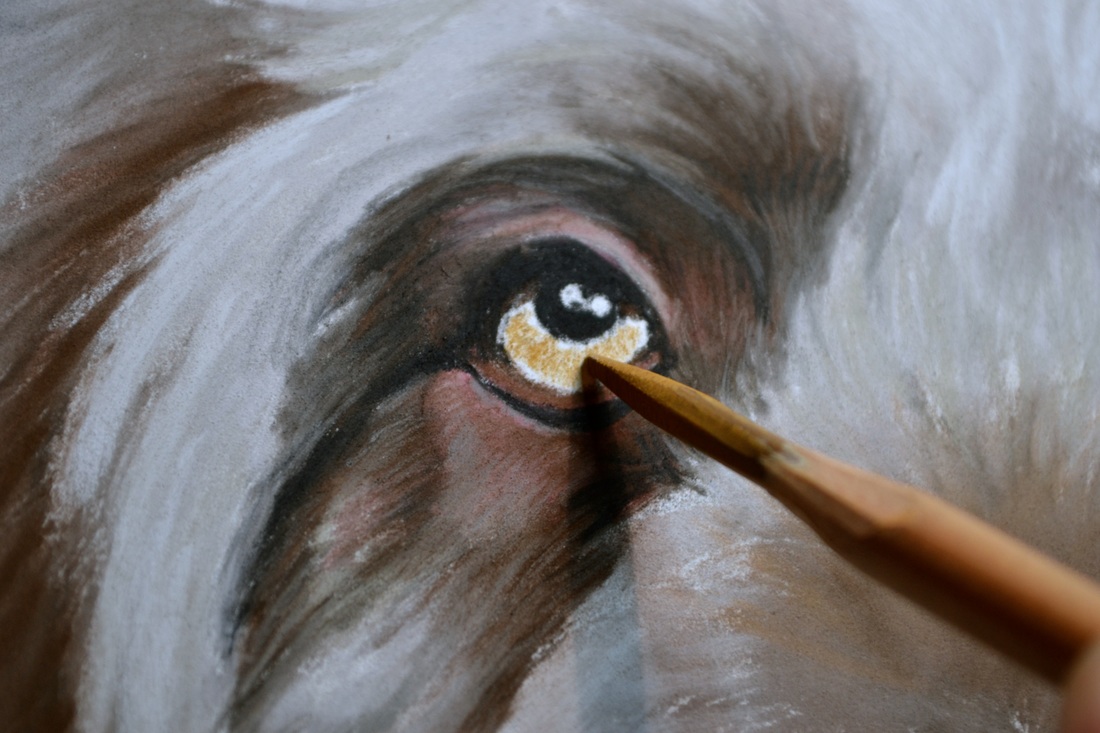 You see in these photos that I began turning those blocks of color into hair strokes around his eyes. Again, many many layers of color to establish that look of real hair. 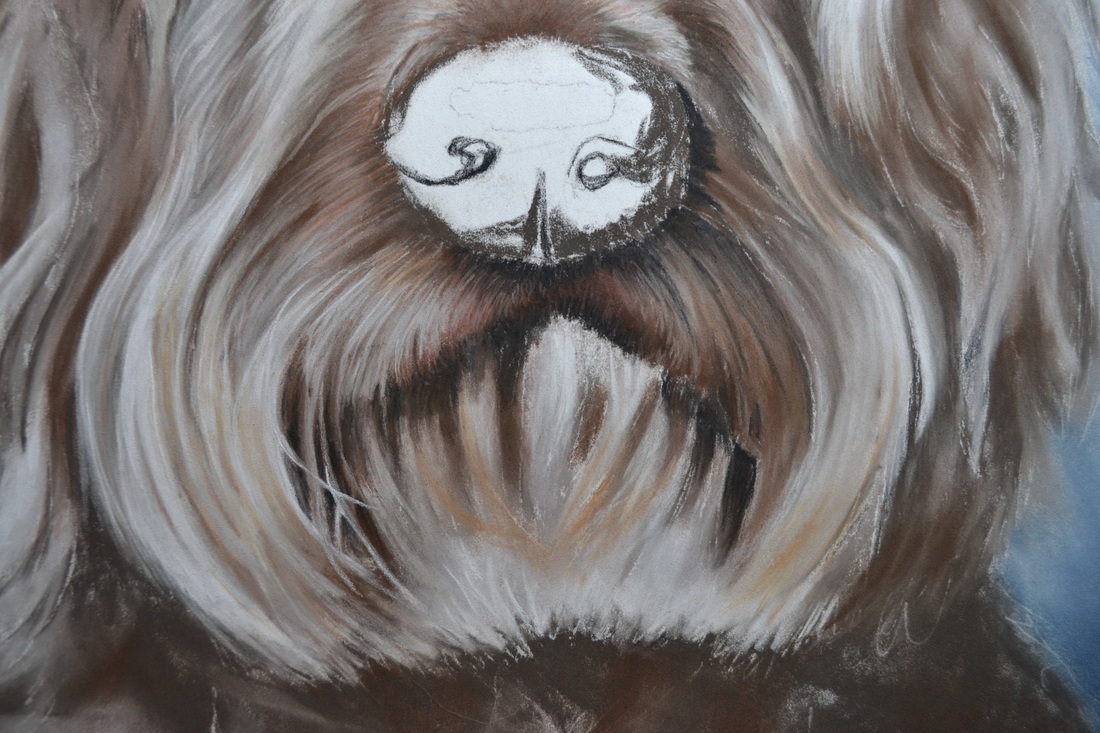 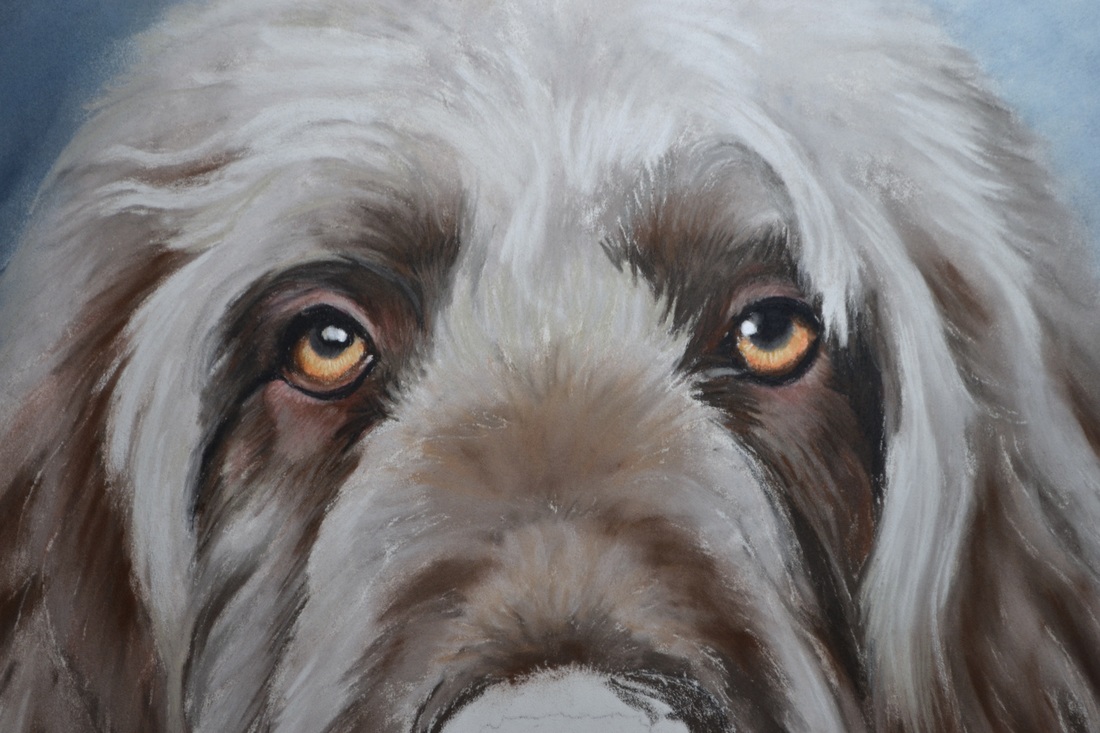 Onto the cheeks and snout... 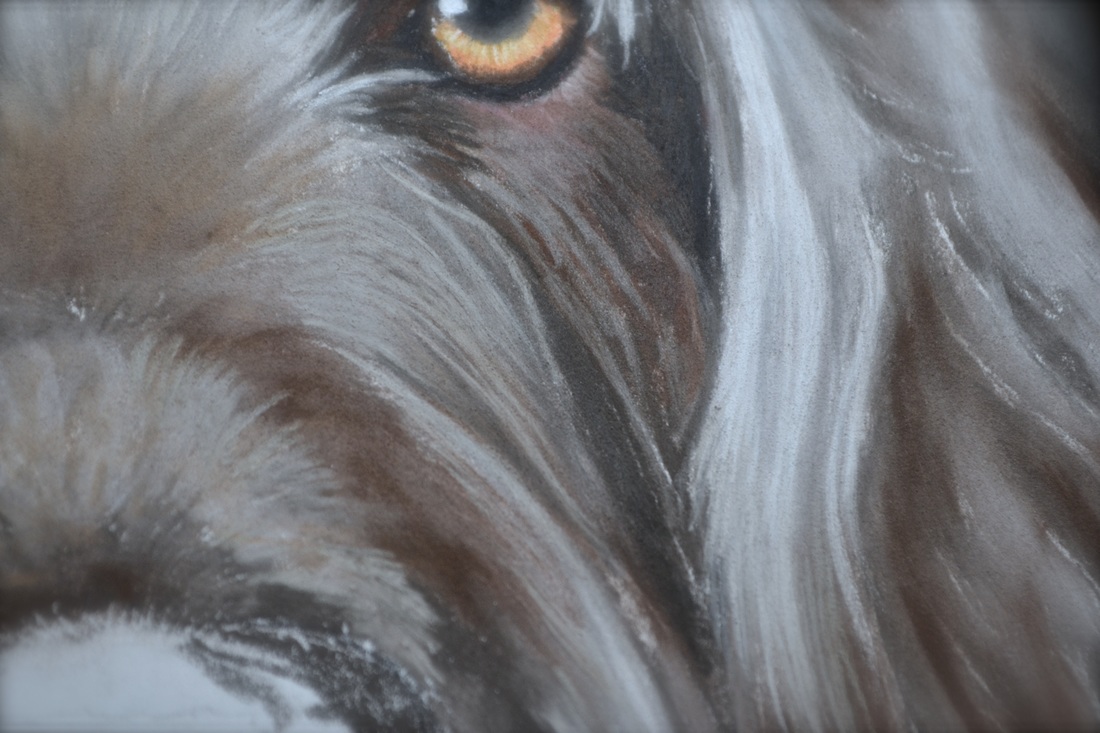 Once the eyes were done, I moved kind of sporadically around his face with the hair stroke movements. It's a matter of darkening the shadows and brightening the highlights.
This is the final effect of all those layers. They give the illusion of depth! :) 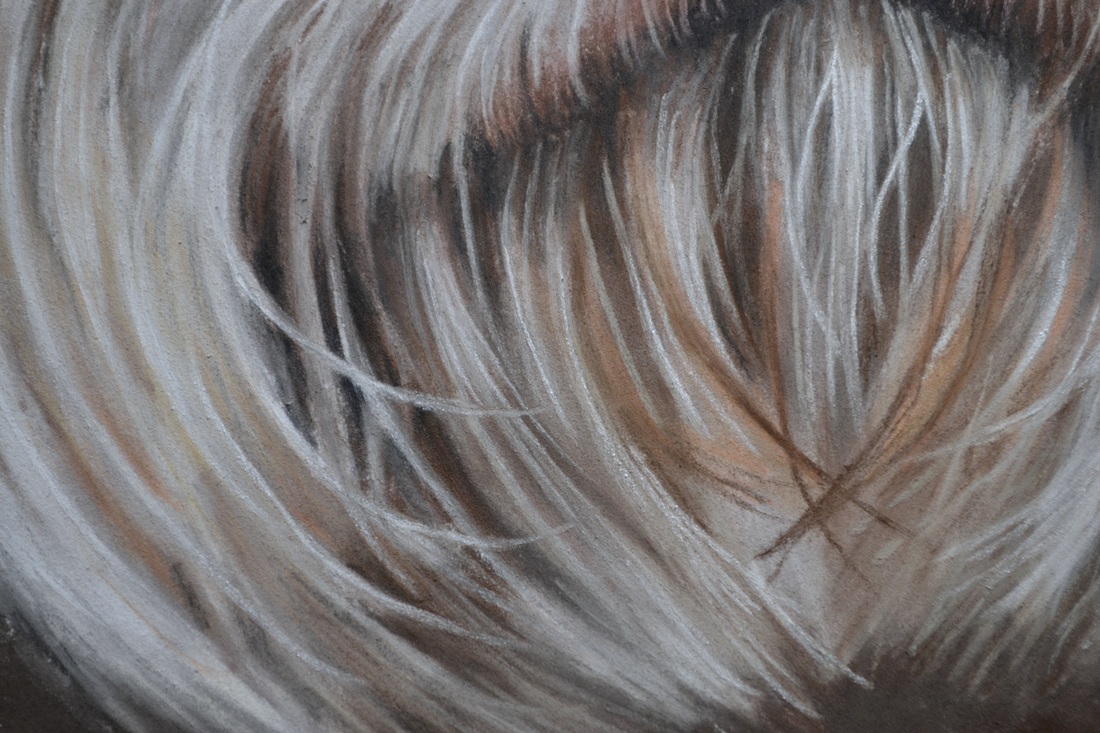 And now, finally, I filled in the nose. (Always one of the last things I complete.) 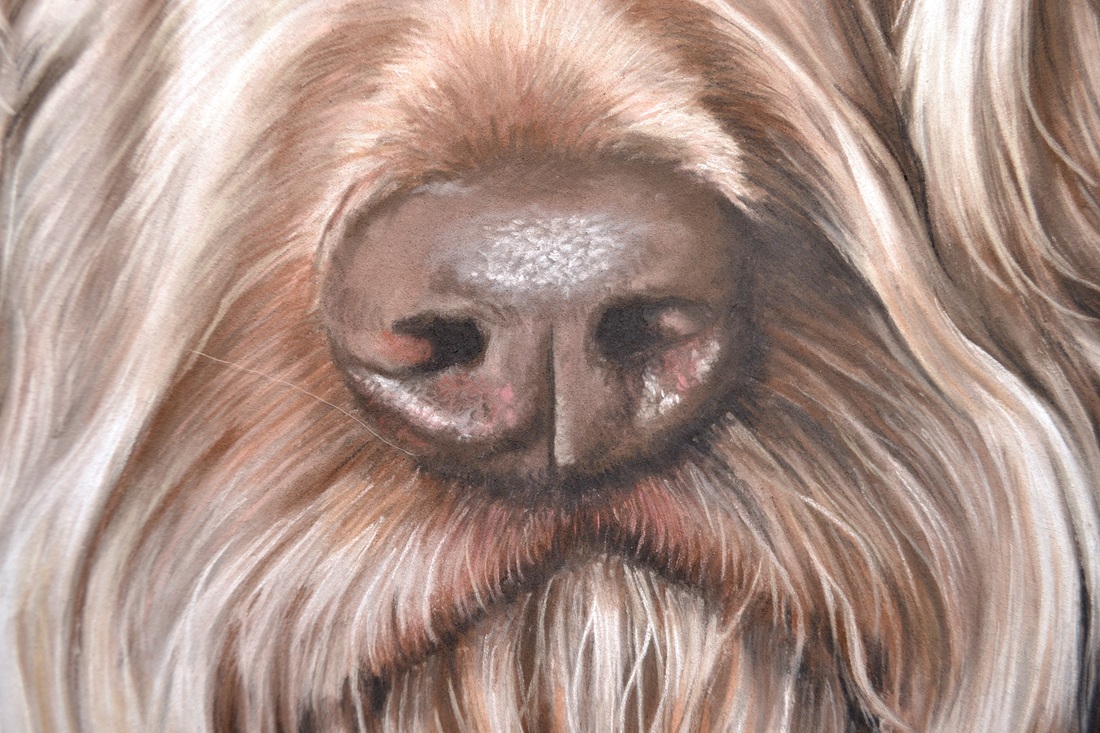 In the final stages, I used stark white and pure black to clarify the really dark shadows and to make the highlights really pop off the paper! 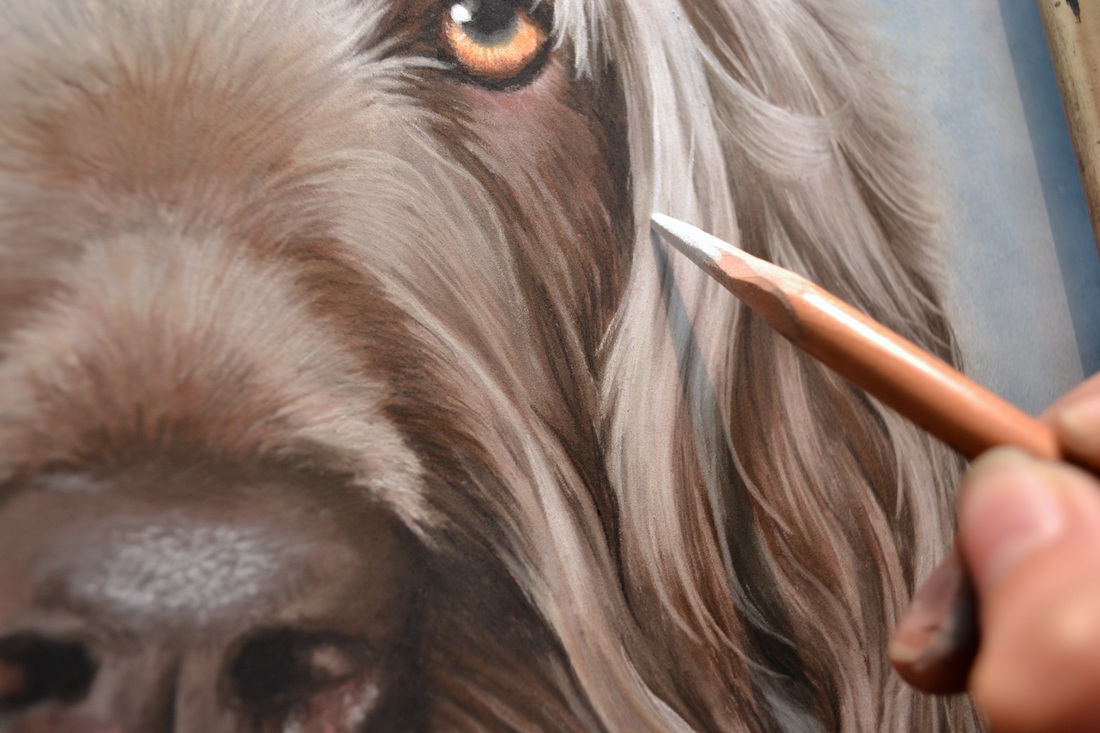 And last but not least, I filled in the neck and chest. Because this is secondary to the face, I based the amount of detail as well as colors and tones with those in the face. I didn't want his chest to be darker or bolder than his head.
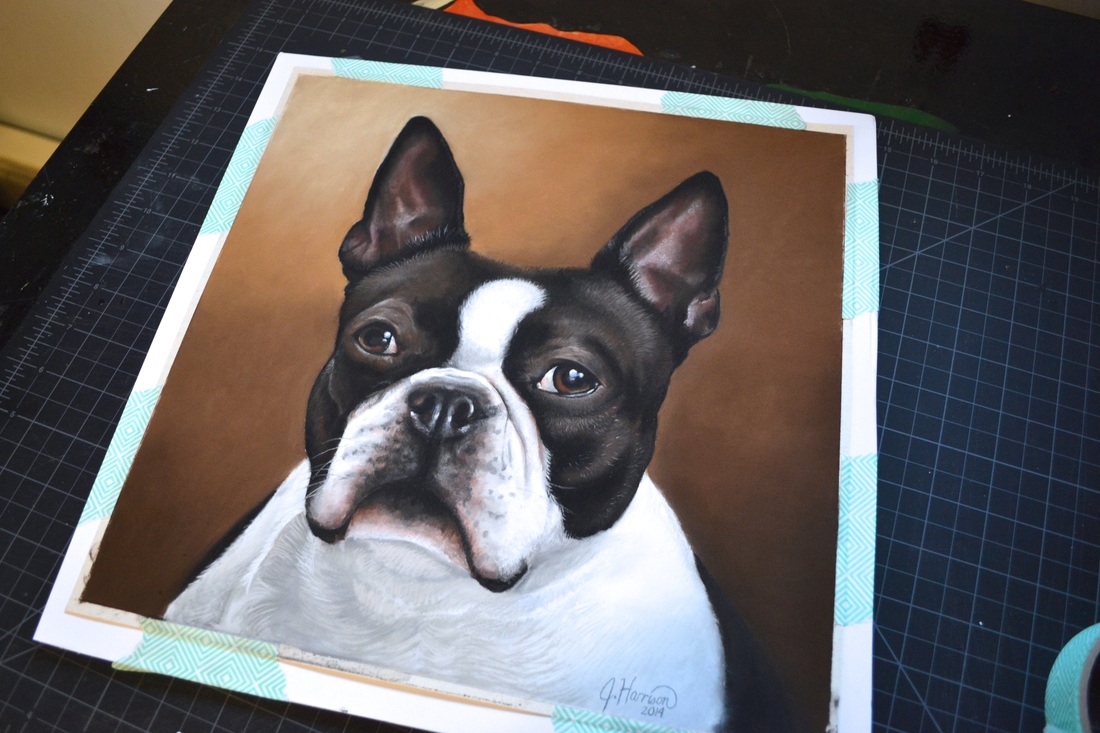
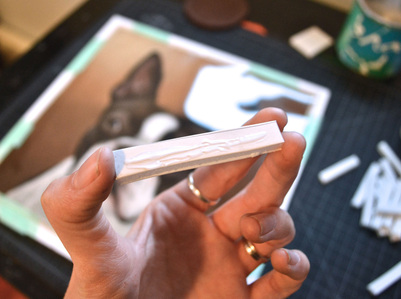
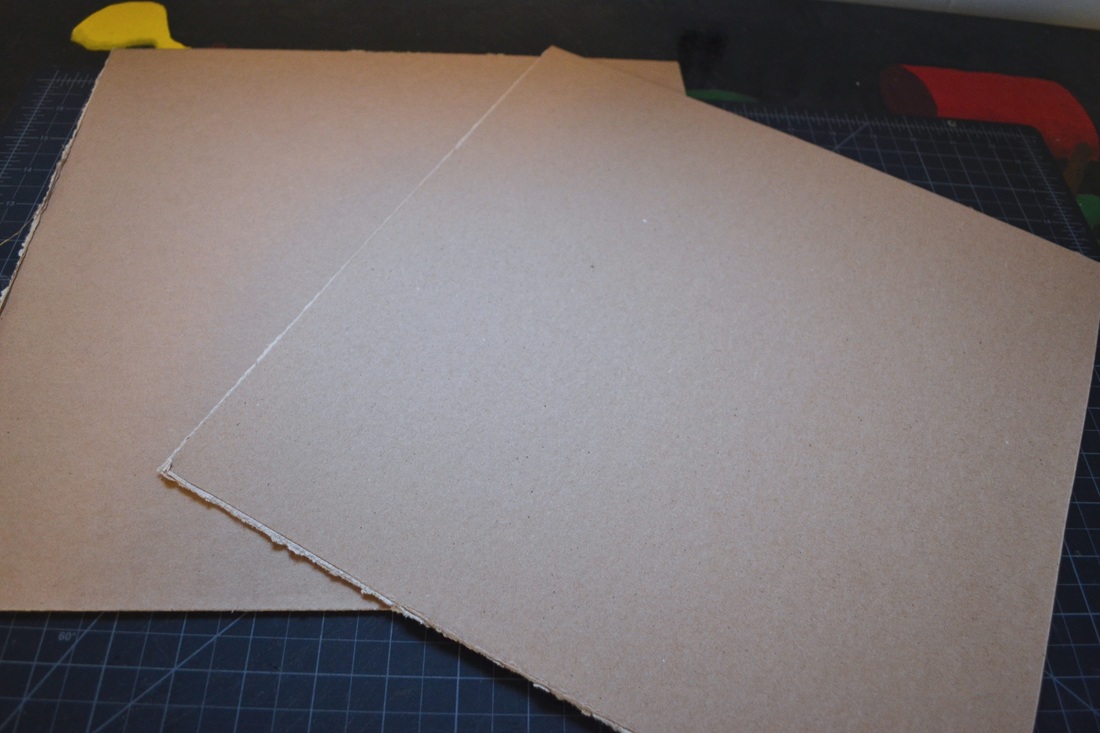
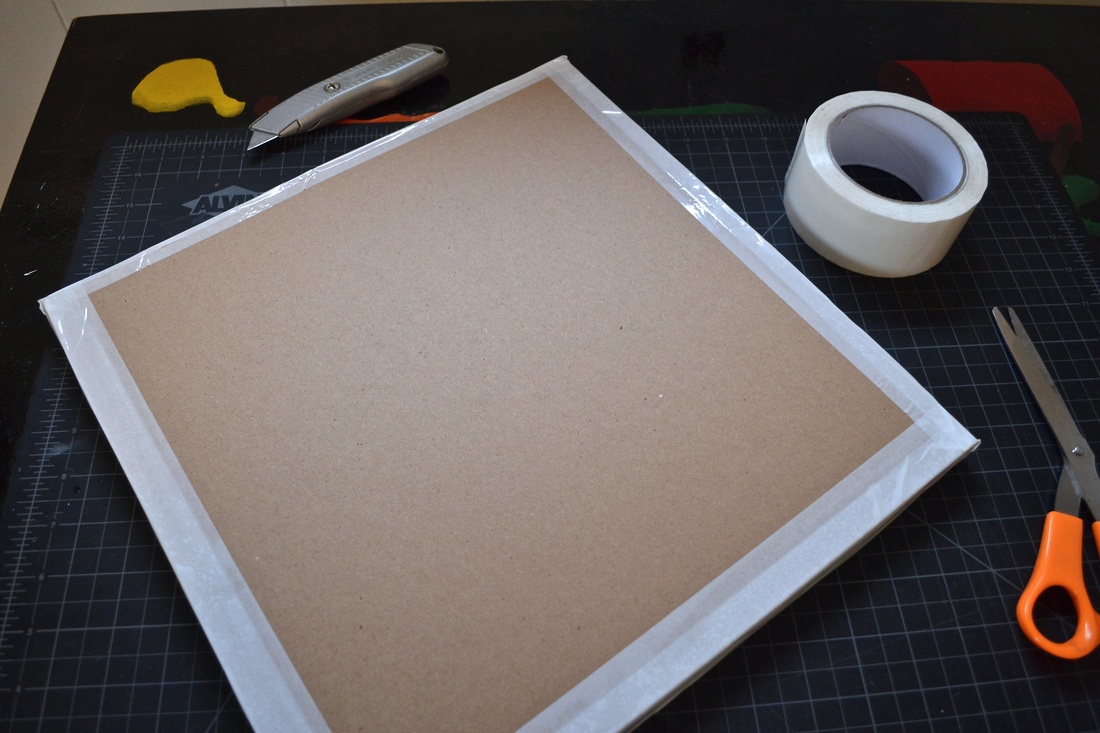
And finally... Harris Puppy is done! 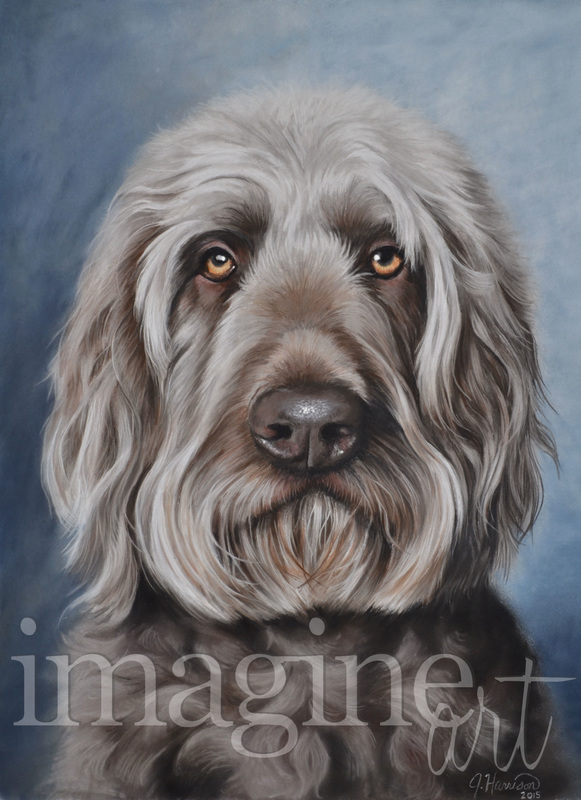 Believe it or not, one of the biggest puzzles I've had to solve in custom portrait work is the transportation. Pastel portraits are extremely delicate. They cannot be touched - by anything, and they have to remain flat. Otherwise, we run the risk of the actual image becoming damaged in the shipping process. The steps I take to ensure that your portrait arrives to your door 100% safe, sound, and intact take hours of measuring, cutting and taping. I don't take any chances here! So, what exactly goes into preparing, packing and shipping a portrait? I've documented all the steps involved in taking the proper precautions to ensure that your portrait arrives to you safe and sound! Today we will be shipping out this 18 x 18" Boston Terrier portrait of "Bailey Ann Benson"! The very first step (which I failed to take pictures of...) is to cut a piece of 1/4" thick foam core board to adhere the portrait to so that it remains still and flat during shipping. This foam core board only comes in massive sizes (30 x 40") and must be cut to size for each portrait. Below you can see the portrait sitting on top of the previously measured foam core board. 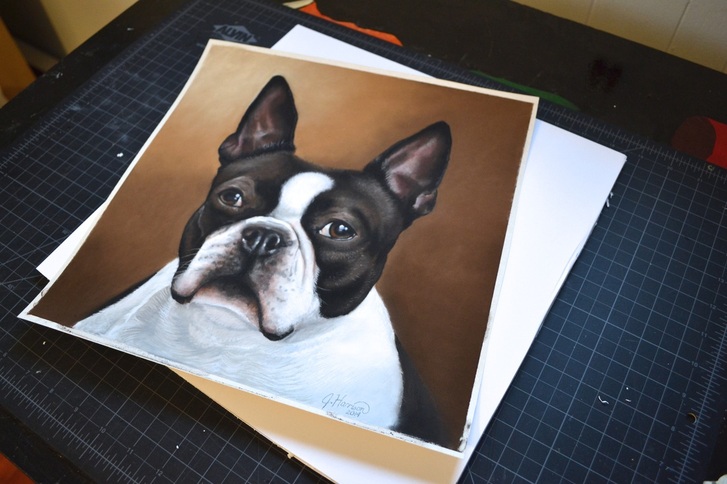 The foam core board will always be about 1" wider than the portrait all the way around, so that I can tape the edges of the portrait down (see photo below) and to attach my "spacers" to, which we'll get into later. I cut two pieces of the foam core board, both the same size. I use small strips of masking tape - strong enough to keep the portrait in place, but easily removed without damaging the portrait. This step ensures that the portrait will not get jostled around inside the package, and also prevents the edges from curling up (like in the first photo). 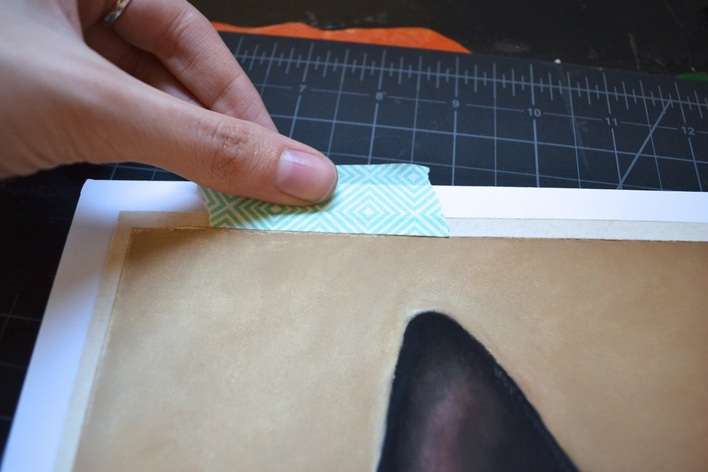
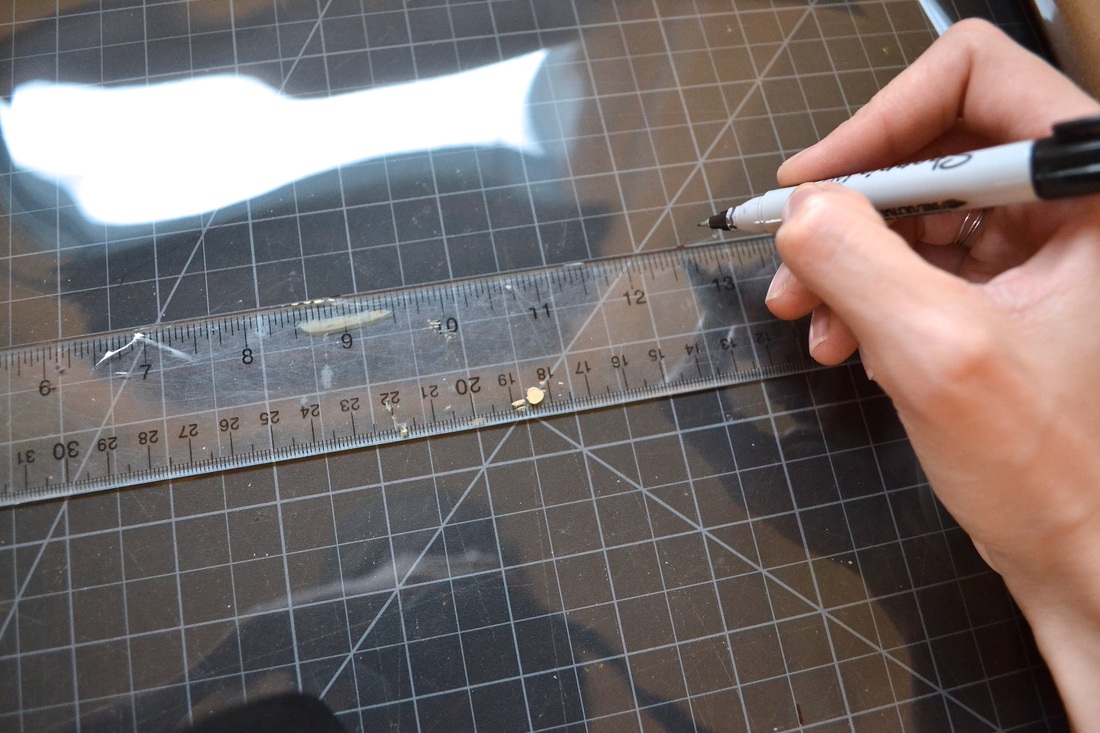
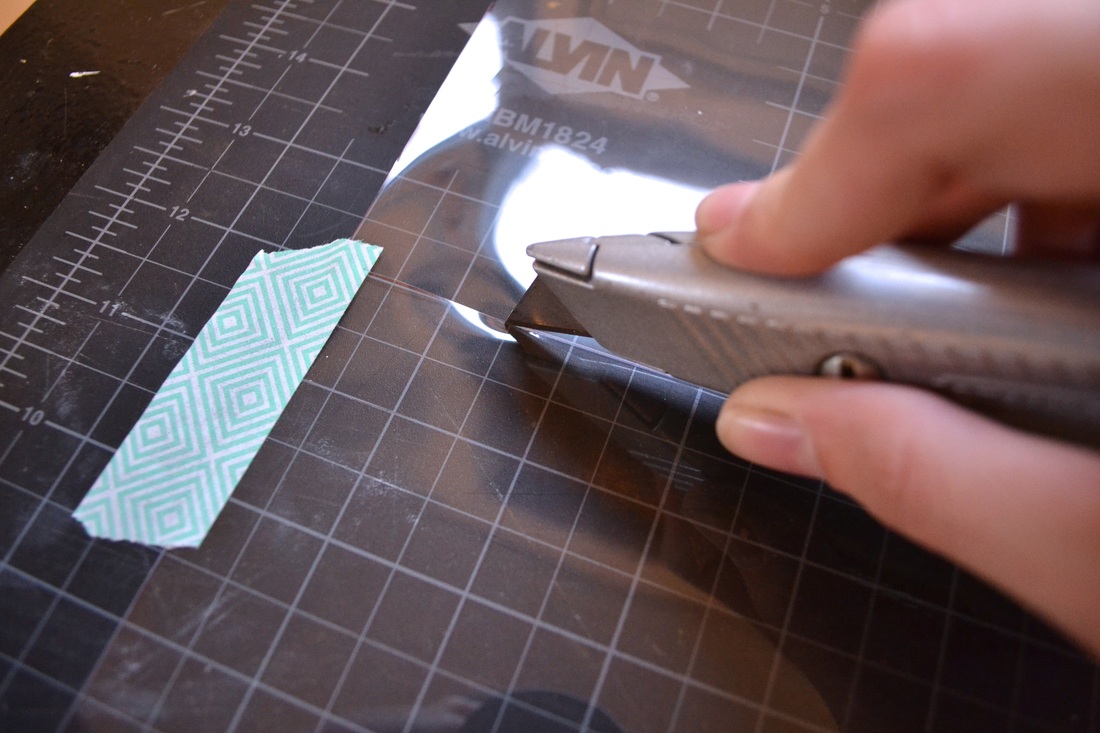
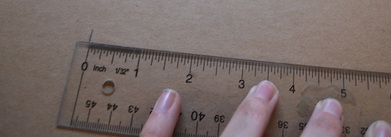
First I take very accurate measurements of the exact portrait size, and then mark guidelines on the glassine before making any cuts. A razor blade makes for cleaner edges than scissors in this case.
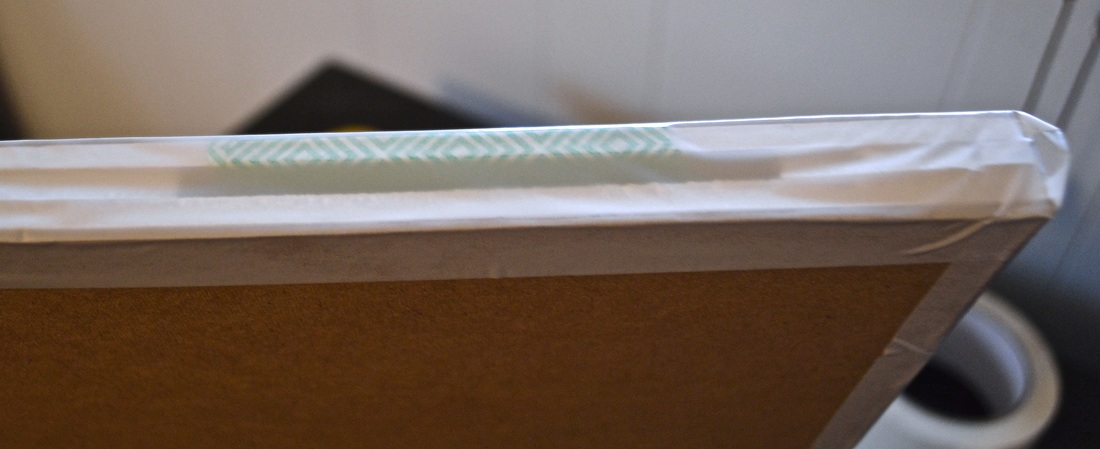
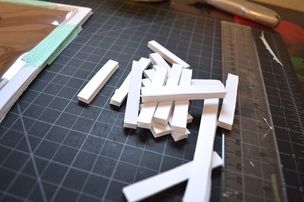
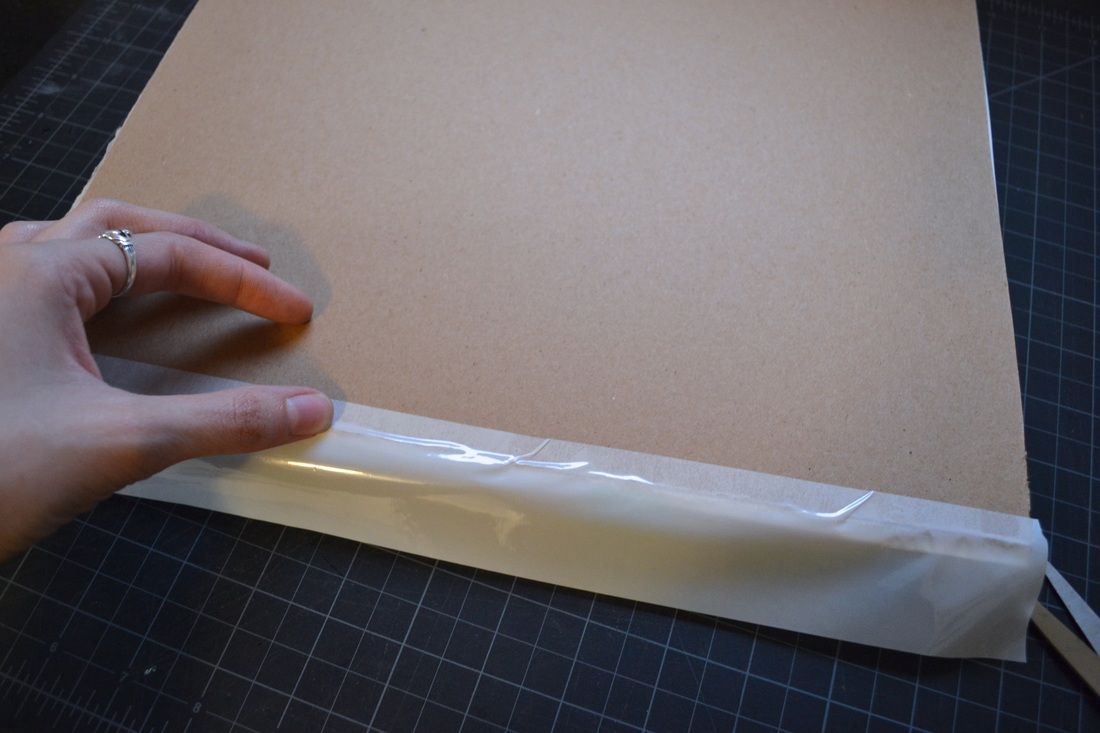
Next, I carefully lay the glassine over the portrait. Once it is lines up just right, I tape down the edges so that there is no movement over the portrait. 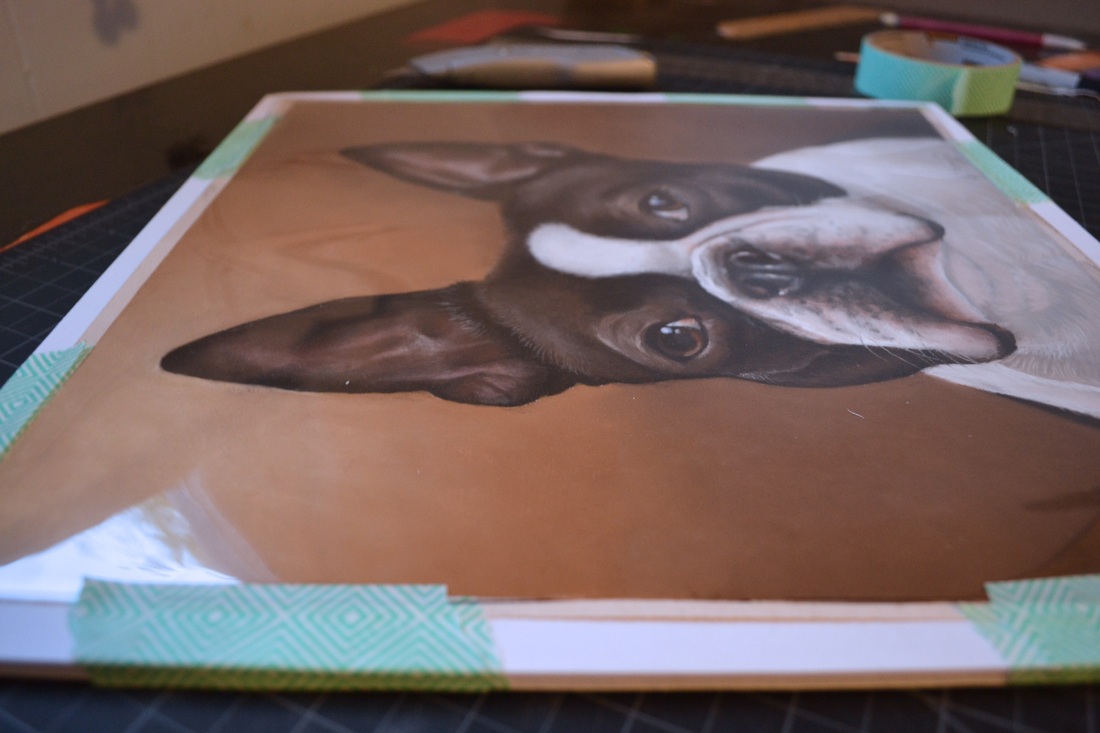 To further ensure that the portrait's surface remains completely untouched during the shipping process, I create a space buffer between the portrait and the top foam core board using "spacers".
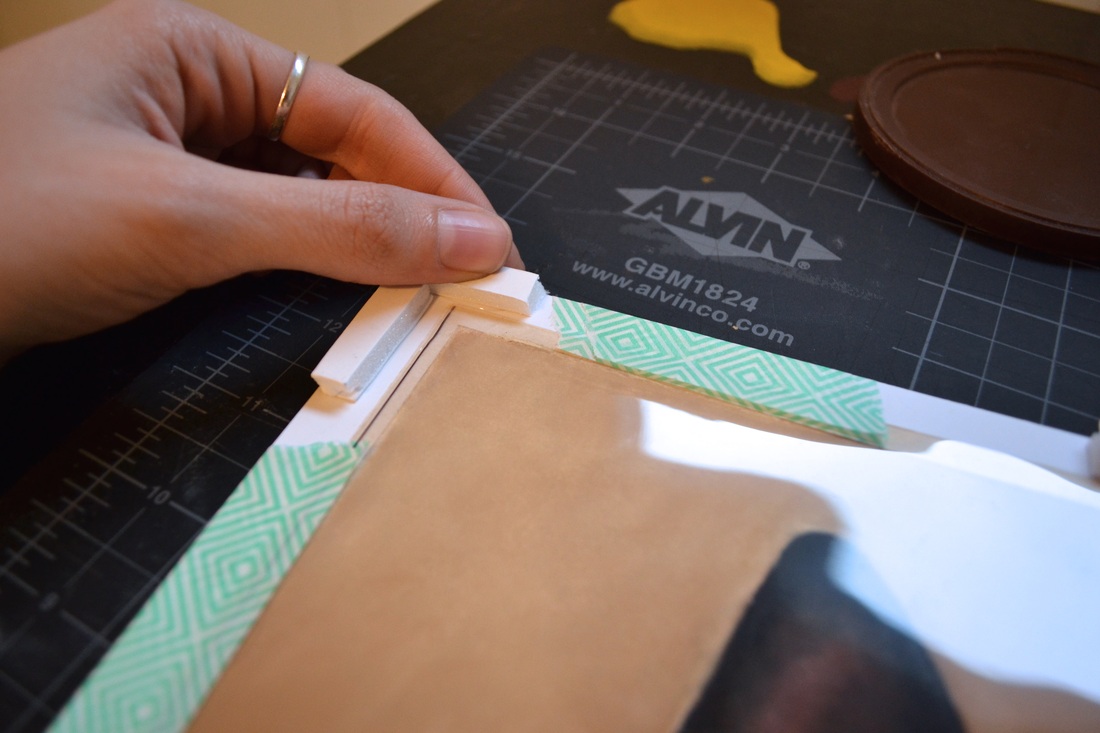 Below, the portrait is completely "framed" in the spacers. Now, when the top piece of foam clare board is laid on top, it will sit on the spacers instead of the portrait. The gap these spacers create is crucial to the integrity of the portrait. 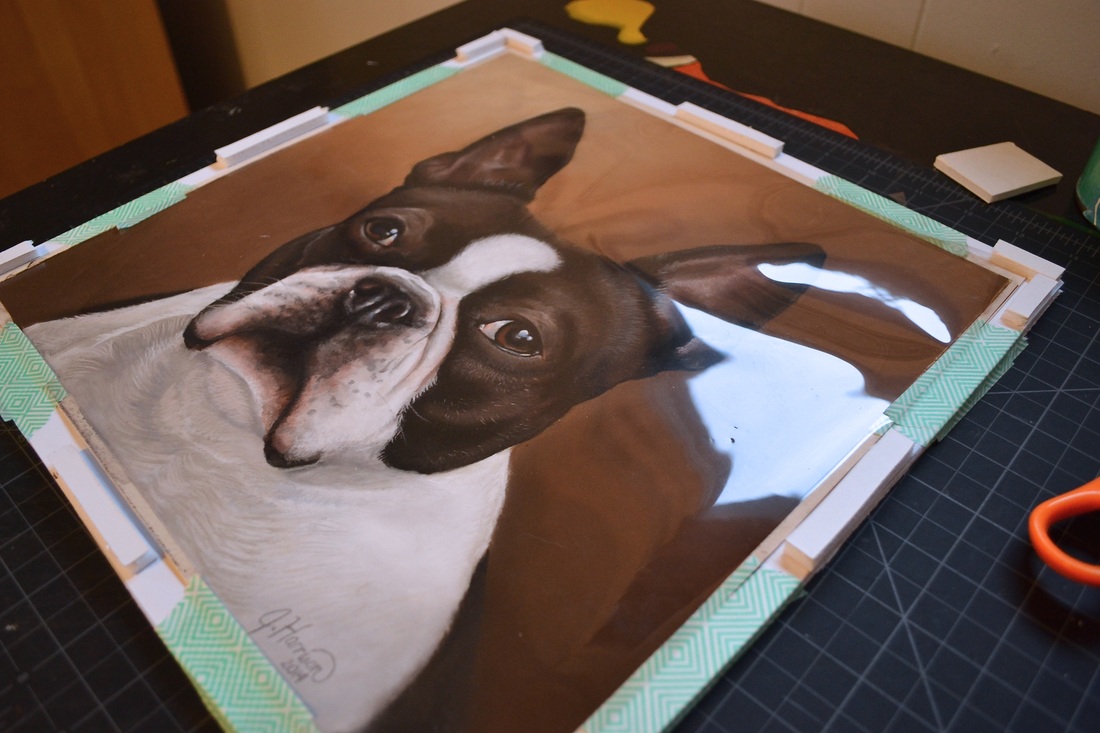 Below, you can see how the spacers allow the portrait to "float" in the shipper with nothing touching the surface, even when the top foam core board is attached. Pretty cool, right? I call this my "portrait sandwich." 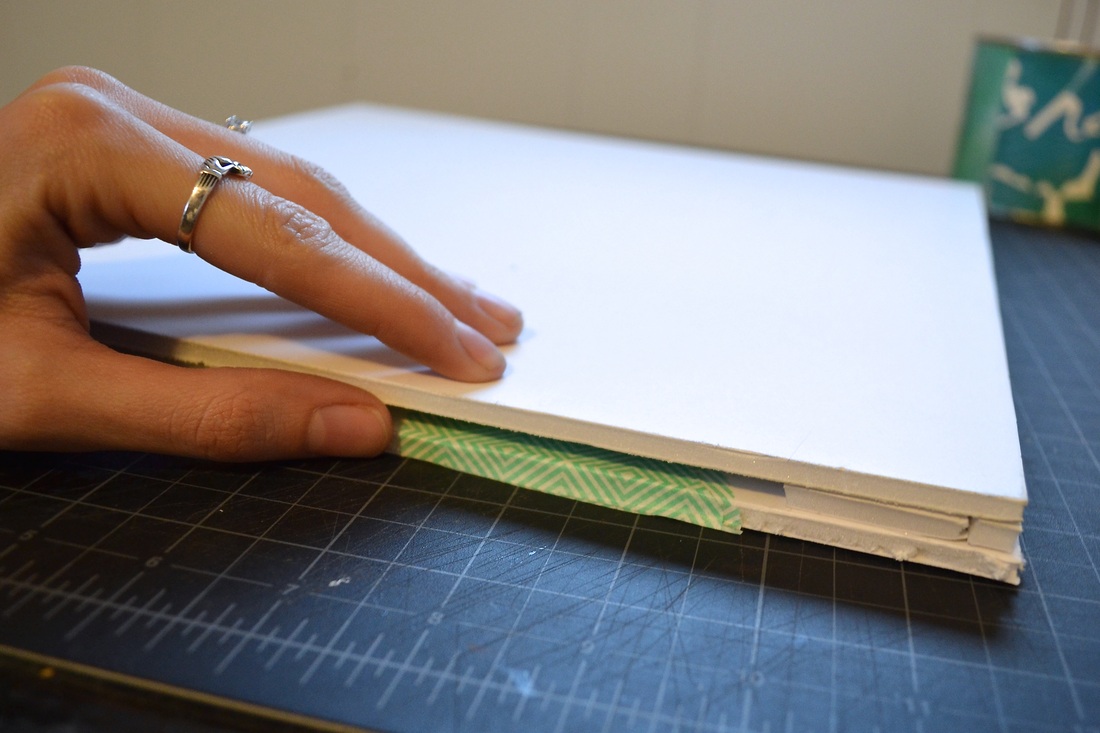 To keep my "portrait sandwich" together, I use a single piece of masking tape per side. Don't worry, I have more packing material than this. ;) 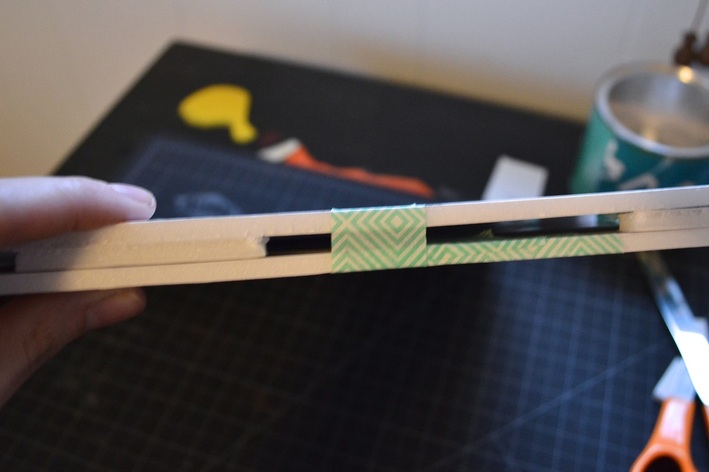
And here are my two sheets (one for each side), cut to the exact length and width of my foam care board. These are attached to the sides of my sandwich with a (semi) opaque packing tape.
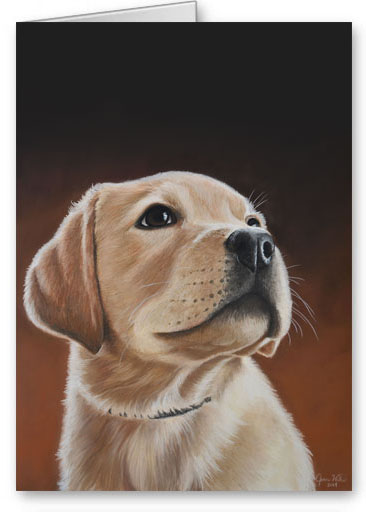
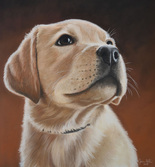
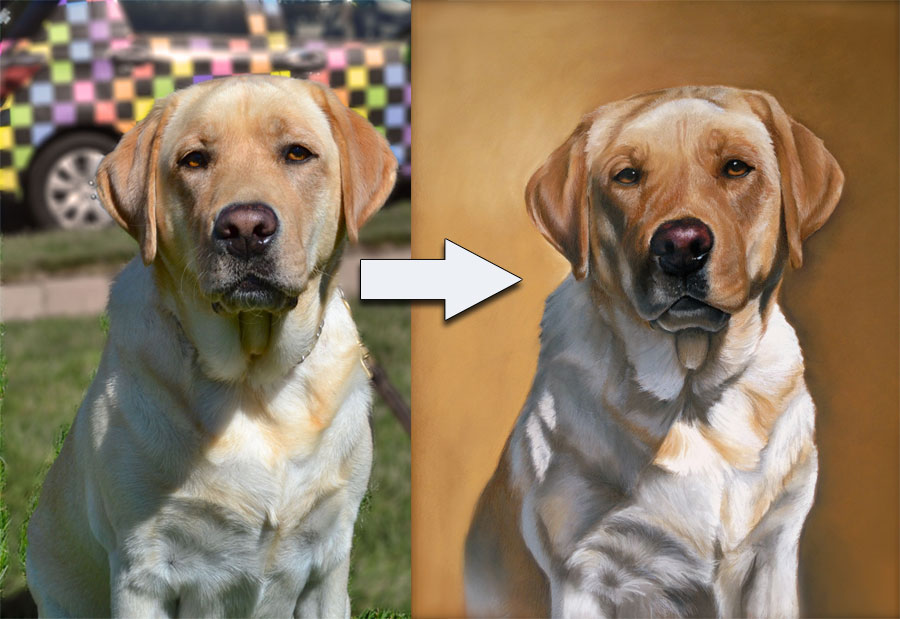
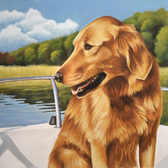
Just needs a shipping label now... And voi-la! This portrait is ready to be shipped! As you can see, all my pet portraits are packaged with the same love and care that went into the design and execution of your custom portrait to ensure that they arrive to you as beautiful as they are before they leave my studio! 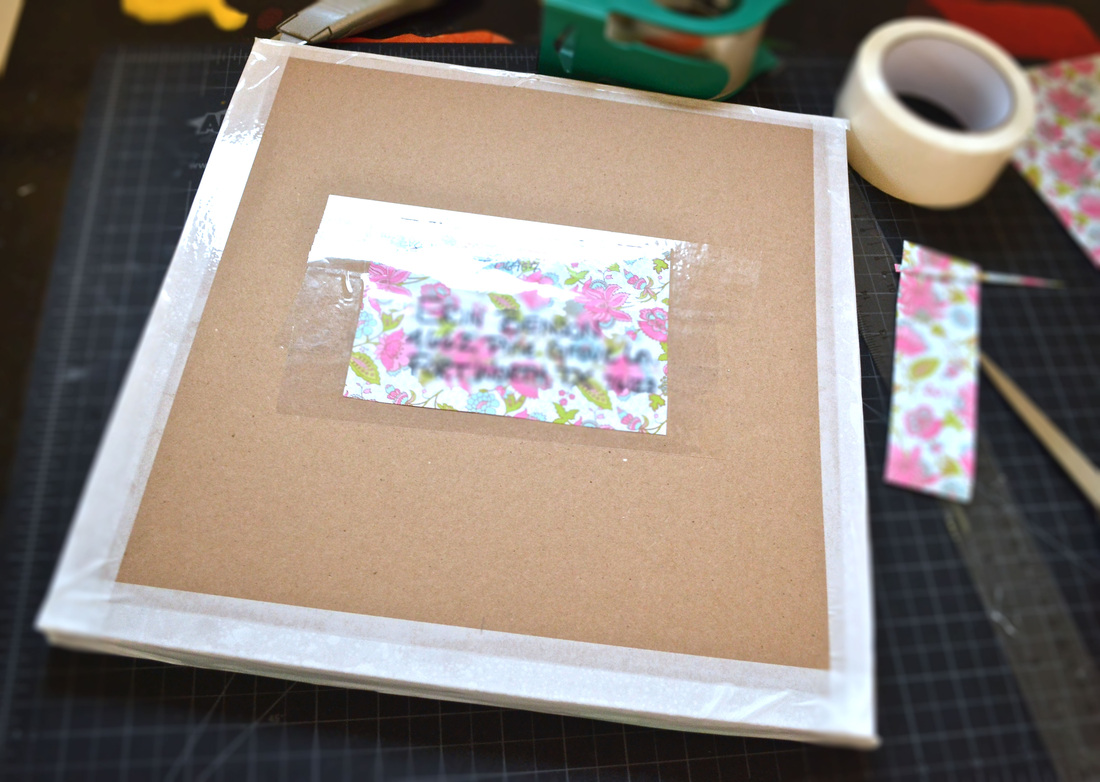 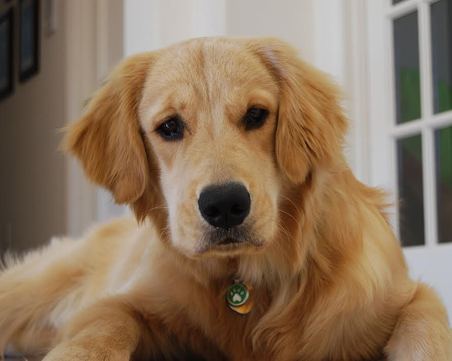 This portrait of "Harry" is one of my favorite portraits to date. I love everything about Golden Retrievers - they have all the love, loyalty and patience you could possible want in a dog, and then some! Harry was a beautiful model to work from. He has that perfect Golden coat - a luminescent gold with hints of sienna and those radiant blonde highlights. That's what made his portrait so much fun to do! I filled in the background first, then started with the lightest tones in Harry's coat. 
Then began adding some darker tones. Love those Burnt Sienna colors! 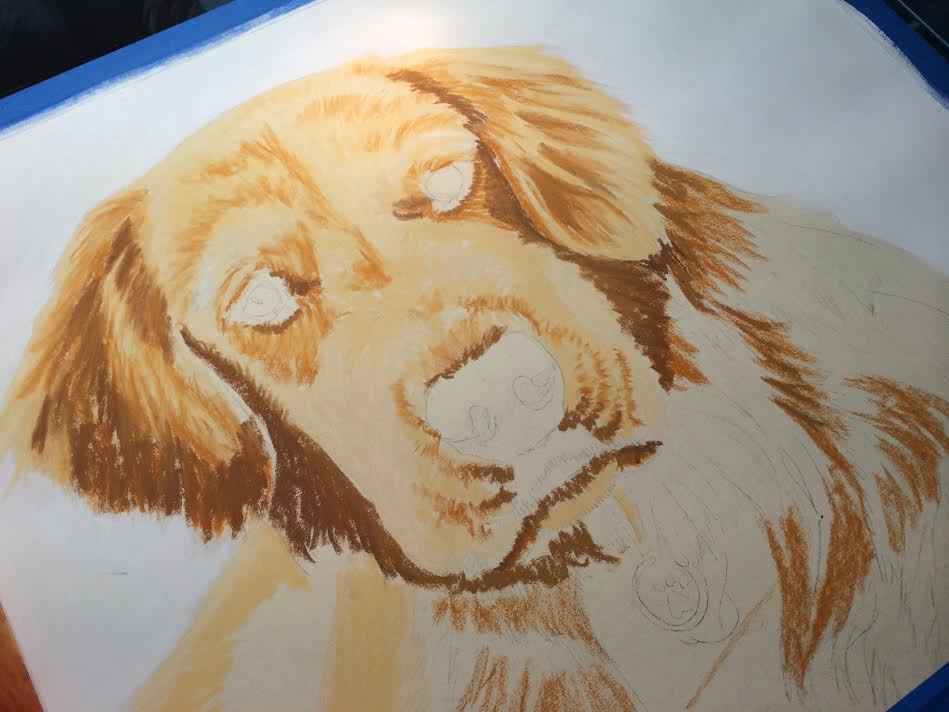
Filled in the remaining shadow areas... 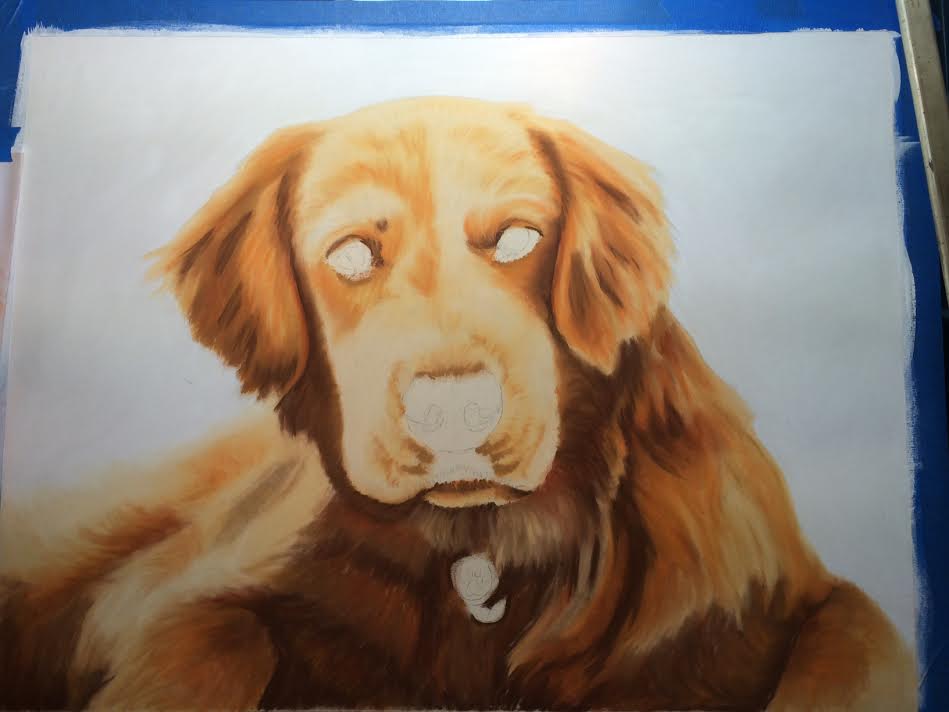
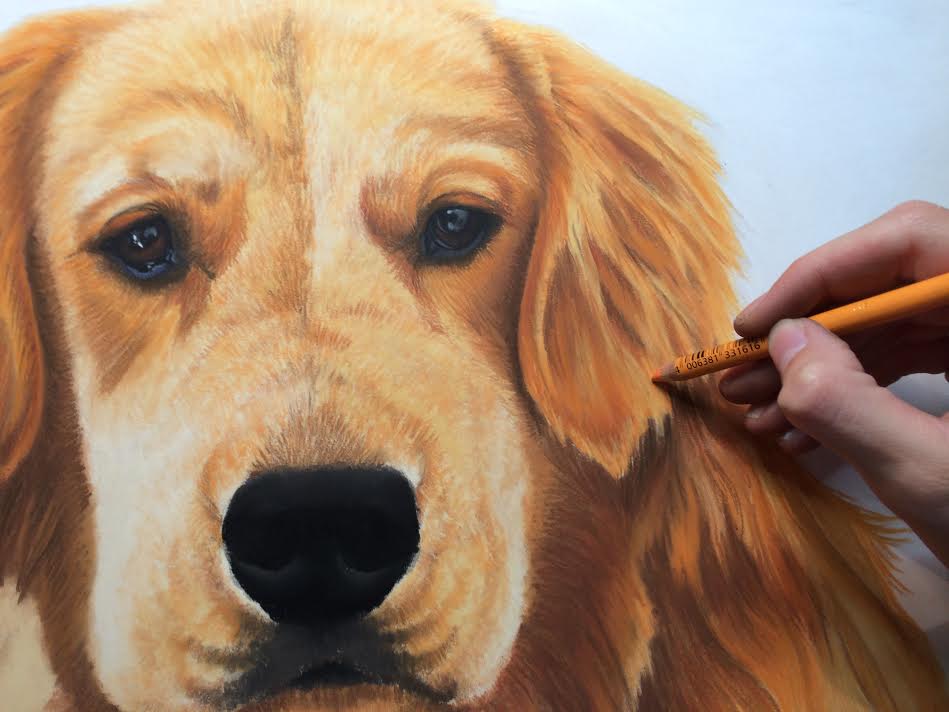
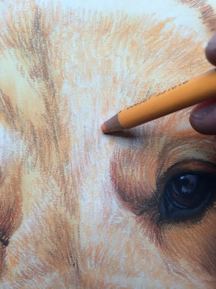
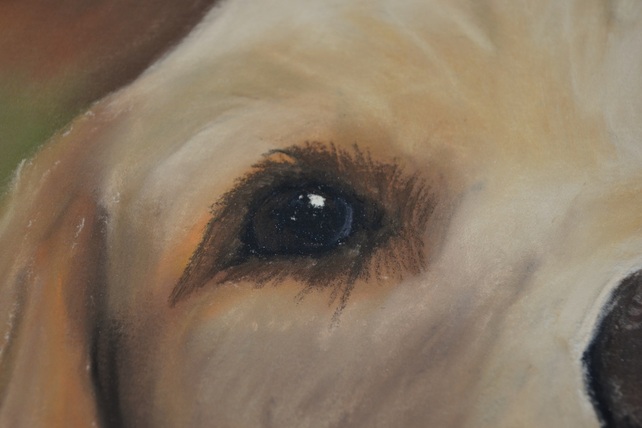
My FAVORITE part: the eyes! They are so integral to the spirit of the portrait - they tell always tell you what your pet is thinking - and sometimes what you're feeling! 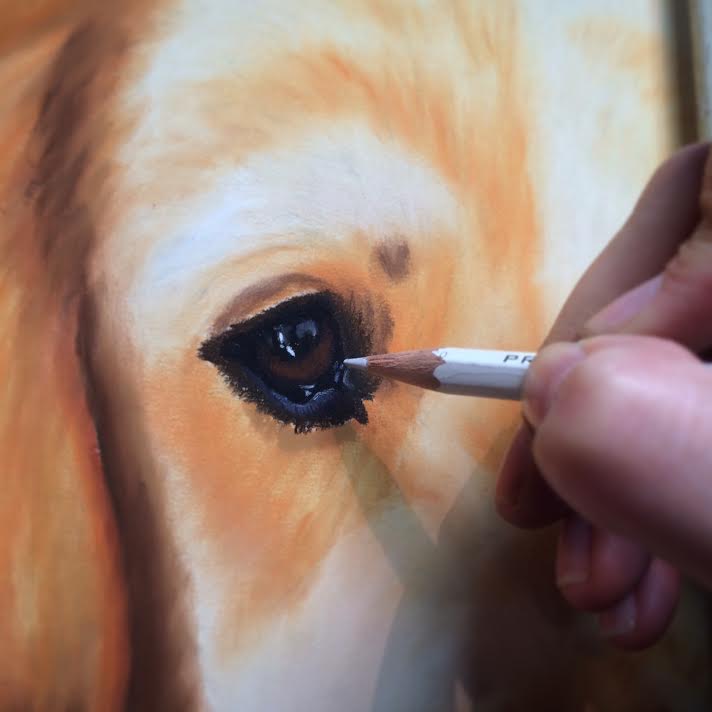
I start with the fine details, working outwards from the eyes. 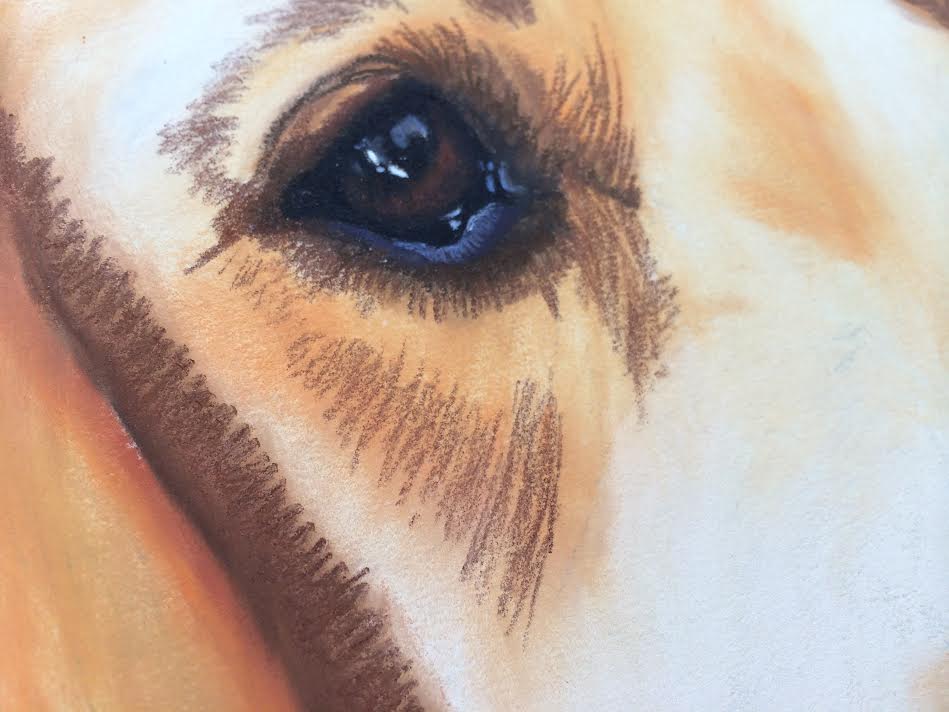
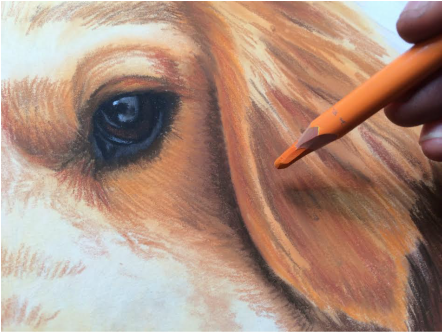
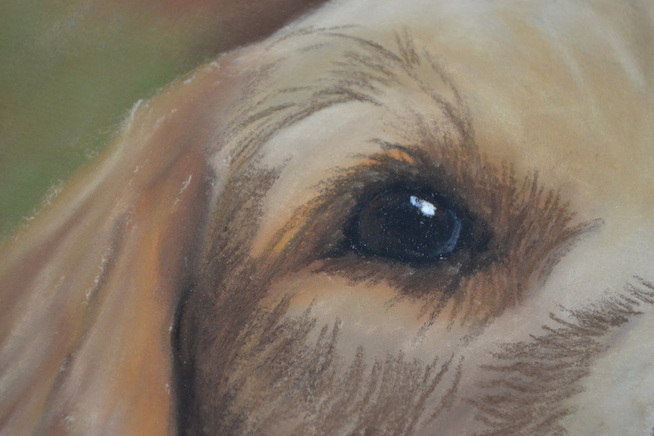
Filled in all the dark textures... 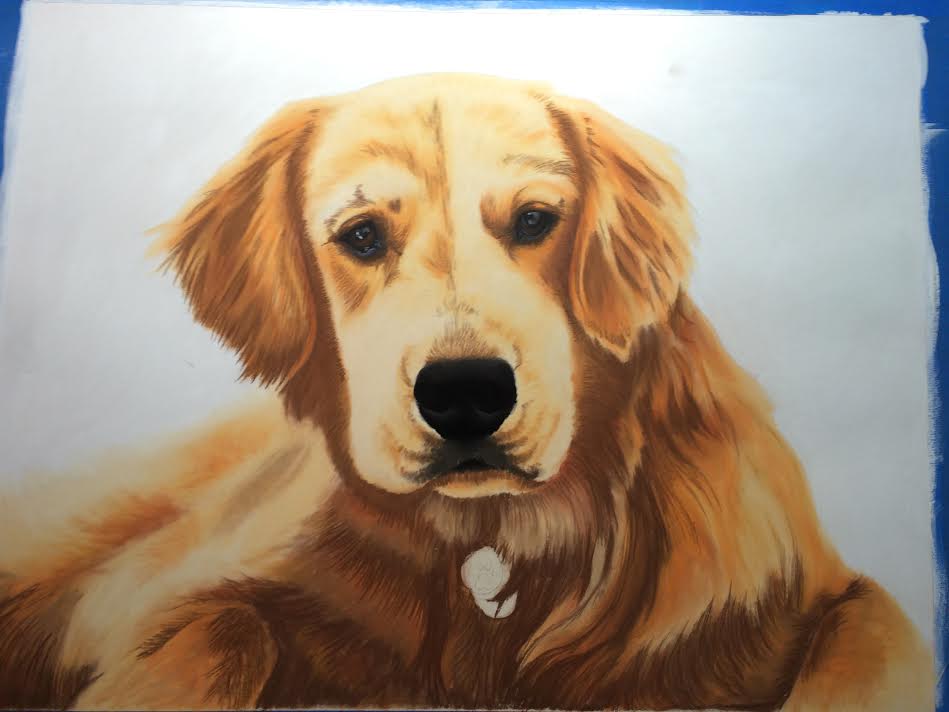
Then continued with dozens of yellow, orange, and red tones to bring out that luminous coat!
Almost done! Just some finishing touches... 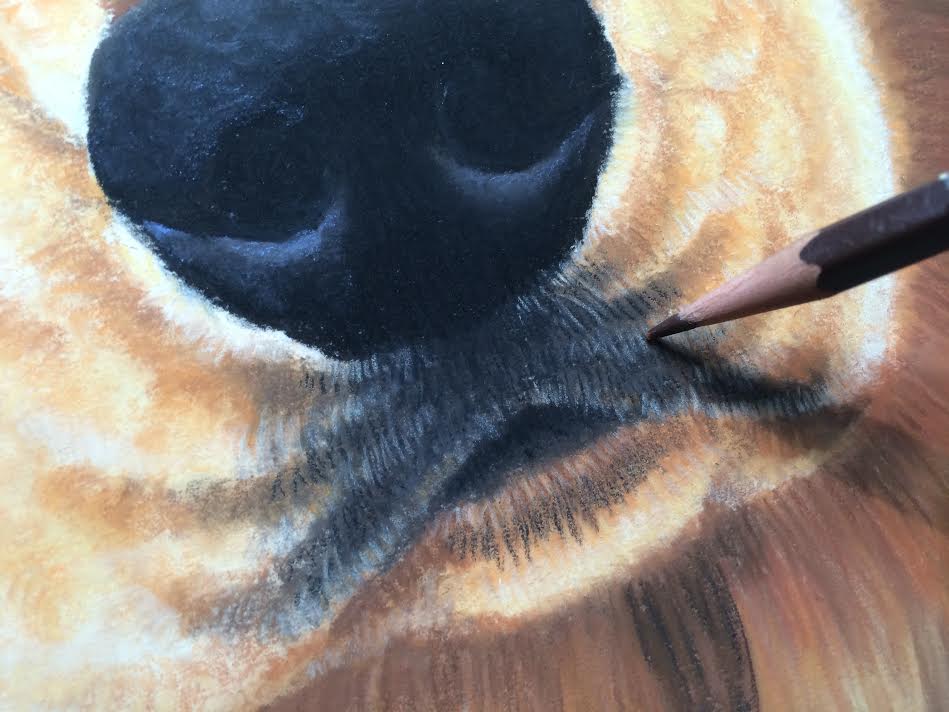
And Voi-La! A beautiful Golden Retriever dog portrait! Harry is just spectacular! 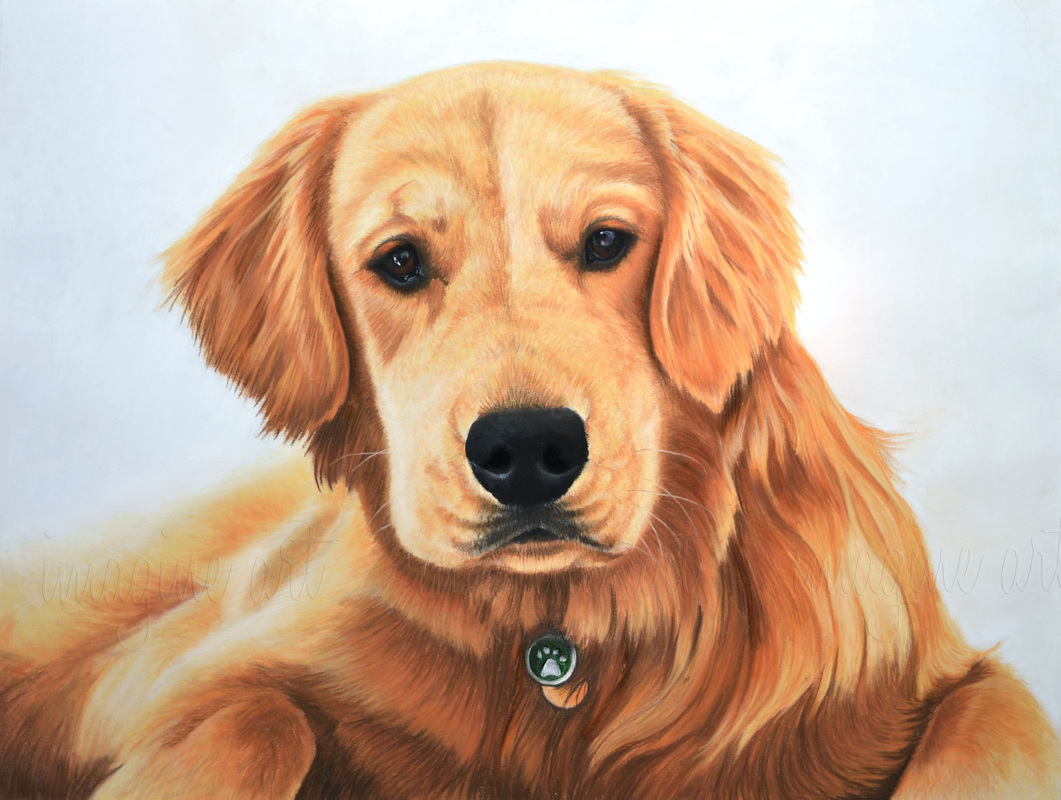
Enter to win a FREE set of 8 Imagine Art Originals greeting cards!To Enter: 1. "LIKE" Imagine Art on Facebook! Click HERE to do that! 2. SHARE this contest announcement post from the Imagine Art Facebook page. 3. COMMENT on that post with your answer. 4. VOTE for your favorite design below.
C. 'Mojo in the Snow'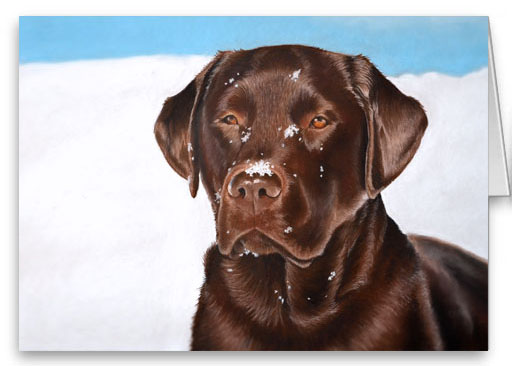 **Disclaimer** This contest is in no way associated with Facebook.
The background of a portrait can really make a huge impact on the style and mood of your pet portrait. Its important to choose a background that suits exactly what you're looking for in a portrait. Take the time to ask yourself these questions:
Your answers to these questions will help to determine the color, style, and detail that is to be used in your background. Let's start with the 2 different types of backgrounds you can choose from: Classic and Custom.
Deciding on a background that suits your portrait is one of many details that will be discussed upon commissioning your portrait. In most cases, a mock image of your portrait will be created and sent to you via email prior to the portrait process. When necessary, multiple mock images can be provided to show differences in colors and composition. This will further guarantee that your portrait will depict your pet exactly the way you'd like!
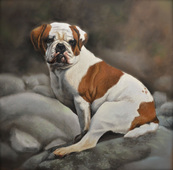
Certainly one of my favorite finalized portraits, ready to hang. Parker Pup is so handsome! :) 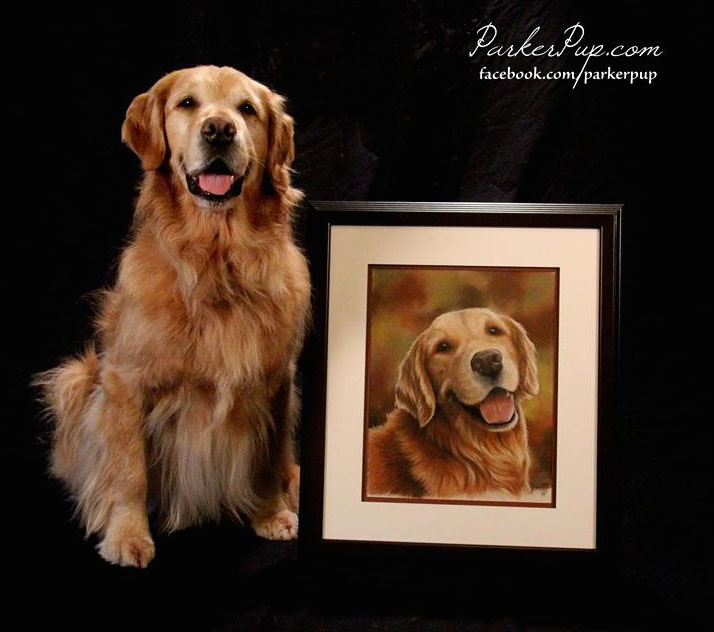
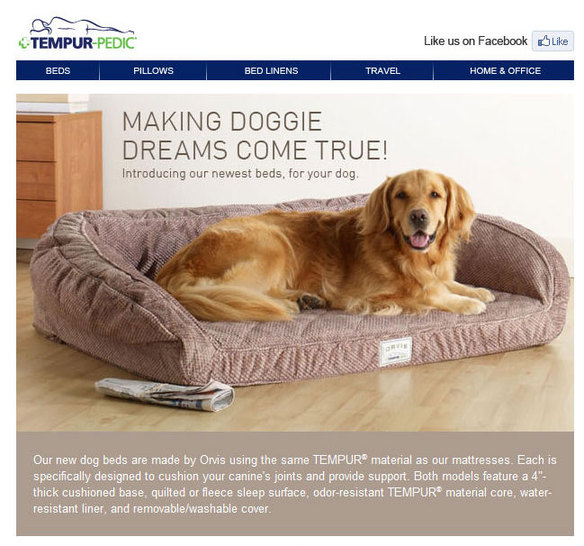
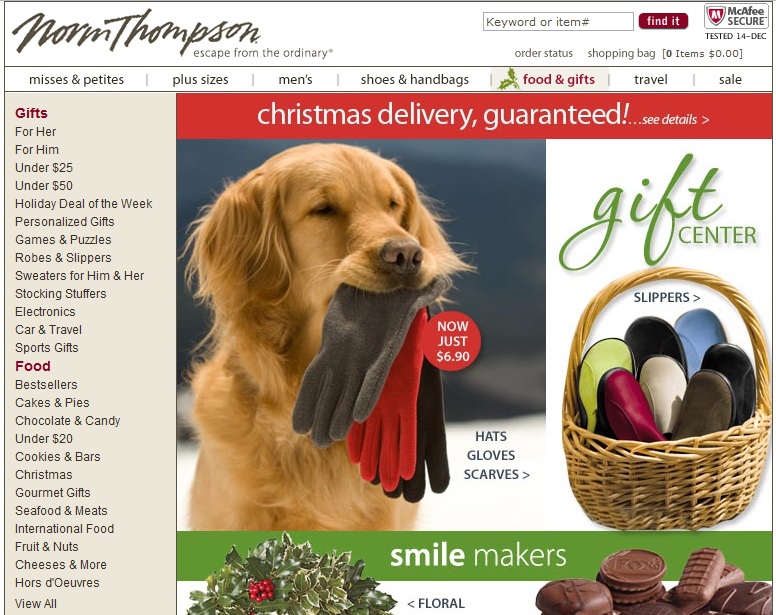
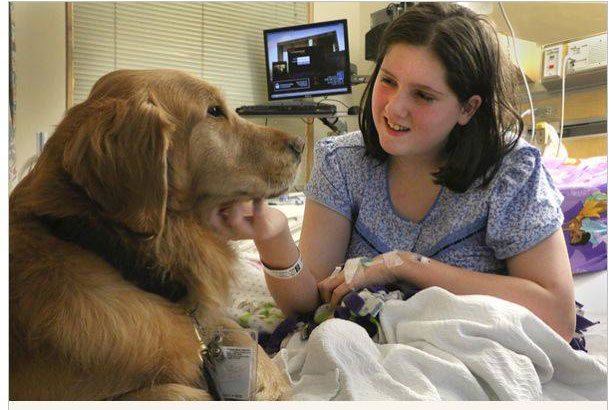
 When I first stumbled upon ParkerPup, I was skimming a "hero dog of the year" website. And what makes ParkerPup a candidate for such an award? ParkerPup is well known in the state of Oregon for his work as a therapy dog. He spends his days visiting children and adults in cancer treatments and those who have long-term hospital stays. He visits students in school to educate them on cancer and to help them learn to read. He is also a major stress reliever to hospital staff! Aside from his heroic reputation, ParkerPup's good looks have made his the perfect professional model for companies like Tempur-pedic and Norm Thompson. Despite his truly handsome classic Golden Retriever looks, ParkerPup is far more than just a cute cuddly doggy gentlemen. Its hard for me to pass up an opportunity to do a portrait of such an honorable pooch!
So here's the start of ParkerPup's portrait. Colors scribbled in for the background. You can see that I started blending them in the lower right corner. 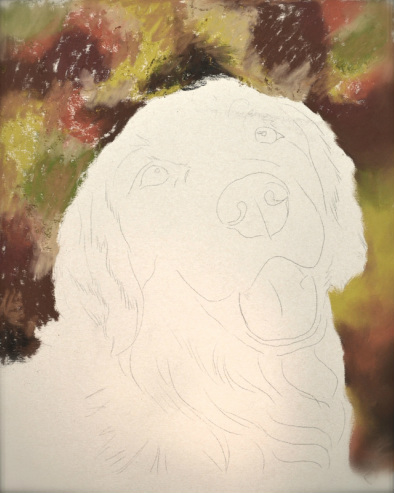
Below, I drew in all the darkest areas (just to mark location and shape). 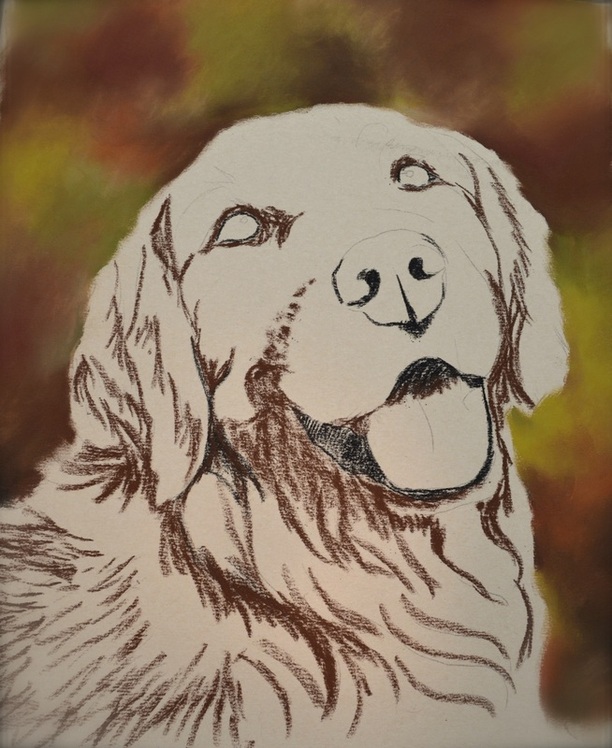
Hey look - its a dog now! Well, almost... Below I laid in the warmer tones of his fur. 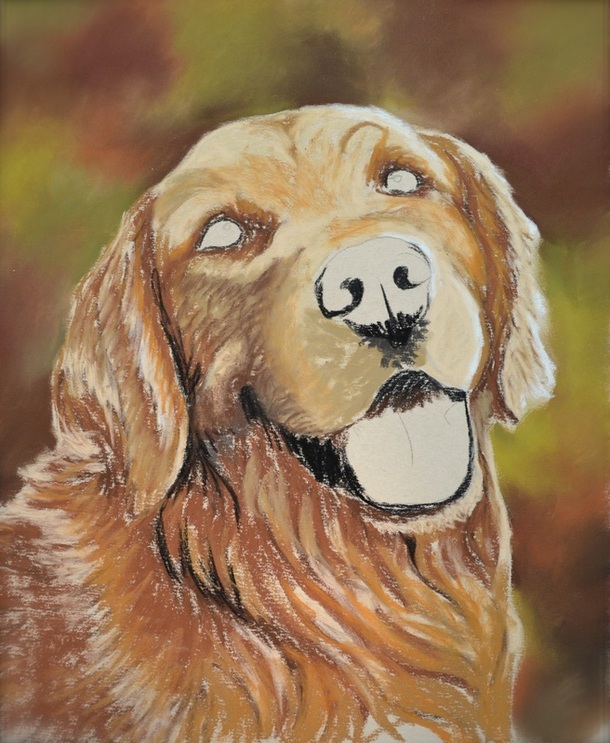
That's better - he has eyes and a nose now! Below I blended the fur colors and laid in eyes, nose, and mouth. 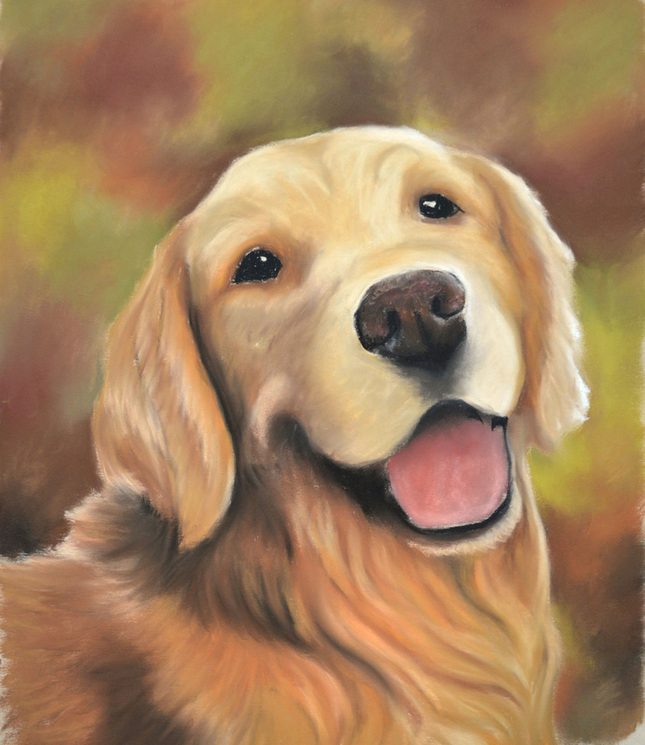
This is my favorite part of every portrait I do - hair strokes! Below, you can see I began around the eye with dark hair. The eyes are the most important feature to any portrait, so I prefer to do them first. It really creates emotion and sets the tone for the rest of the portrait.
Those hair strokes help to create the light and shadow areas that really make the portrait POP! The texture it creates also makes the portrait so realistic that it looks like ParkerPup can jump off the paper! 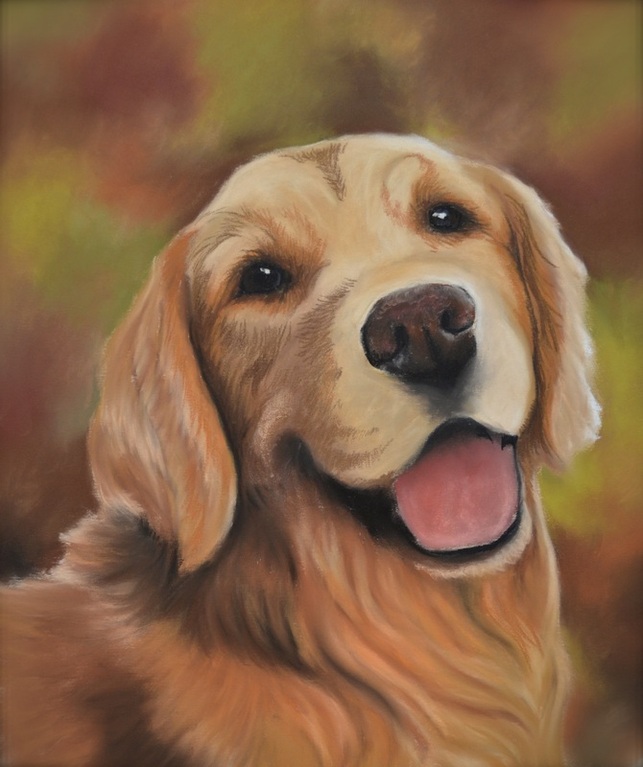
Below, I also drew hair stokes in with warm mid tones and highlights. (just the face) 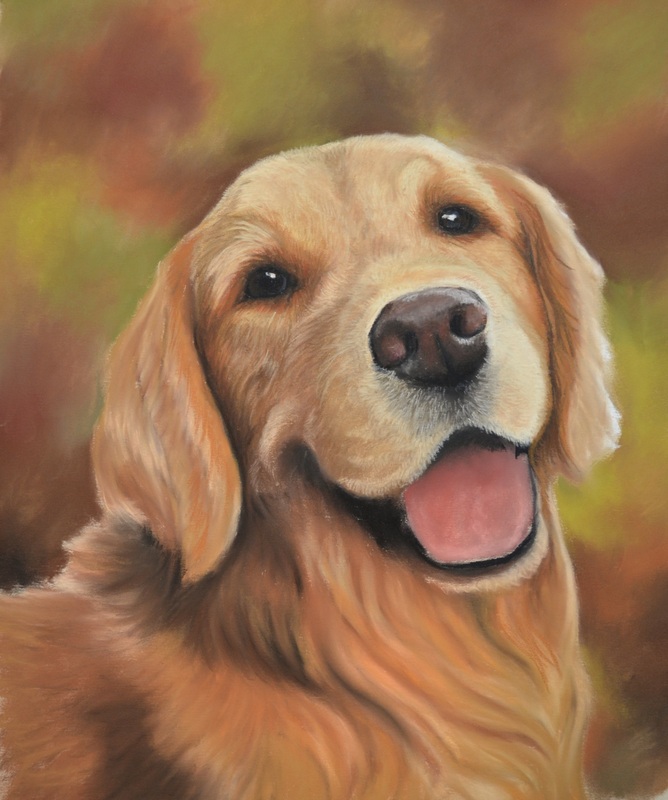
And then the rest of the portrait with the same, creating that soft, silky hair texture that makes ParkerPup so cuddly! 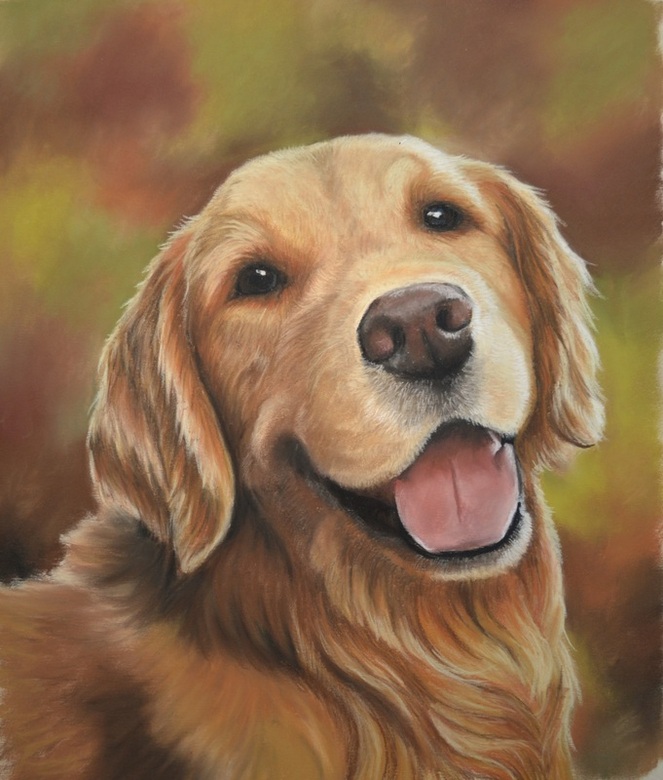
Below, you can see all the colors that go into that golden fur - ochres, browns, siennas, bright orange and red! 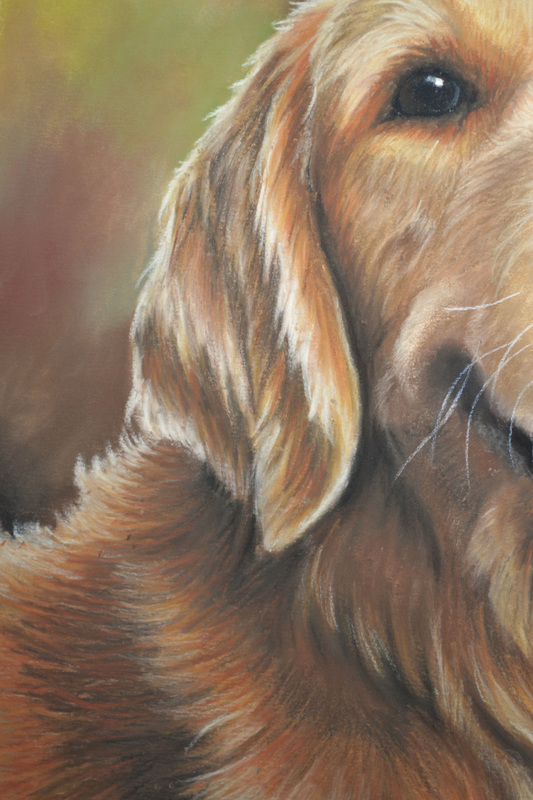
A few finishing touches, and voila! Its the handsome, the cuddly, the heroic PARKERPUP! 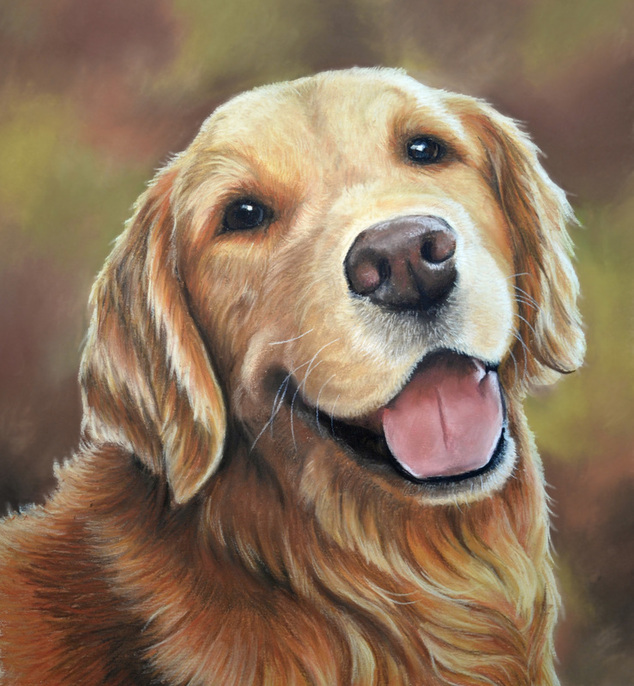
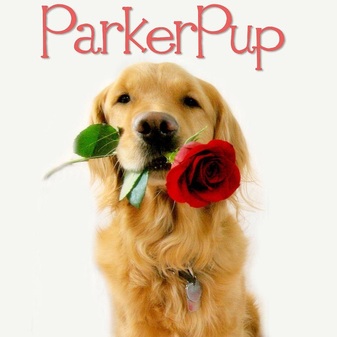
Be sure to check out everything about ParkerPup online at http://www.parkerpup.com.
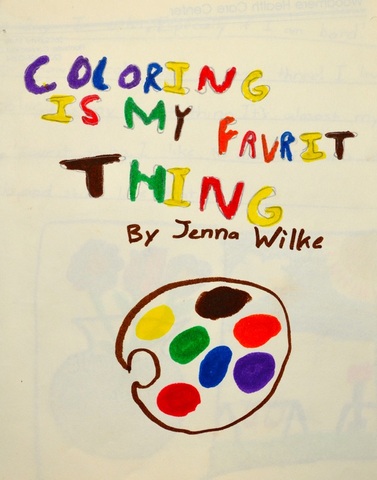
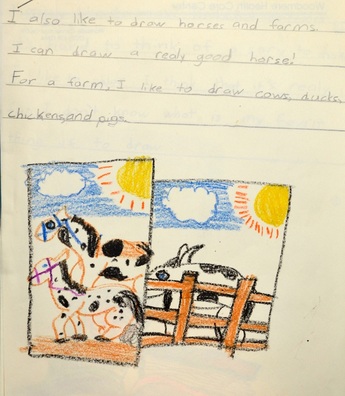
To see photos from all his therapy, cancer awareness, and dog hero campaigns, follow him on Facebook: https://www.facebook.com/ParkerPup ALWAYS.I don't remember a time in my life when I wasn't so entertained by [creating] art that it was, by far, my favorite activity. Buried deep in a box my parent's had bestowed upon me a few years ago, I found this collection of drawings from my very early years as both an artist, and very clearly a cowgirl (in my dreams). Here is the cover of a short story I wrote about my "favorit" things. Page one had include my young love for horses (and apparently spotted pigs with rabbit ears?) Age 6.
And just in case you didn't get it from that story, here it is again in a different short story. I had quite a fascination with paints, in case you didn't notice. ;) Age 7 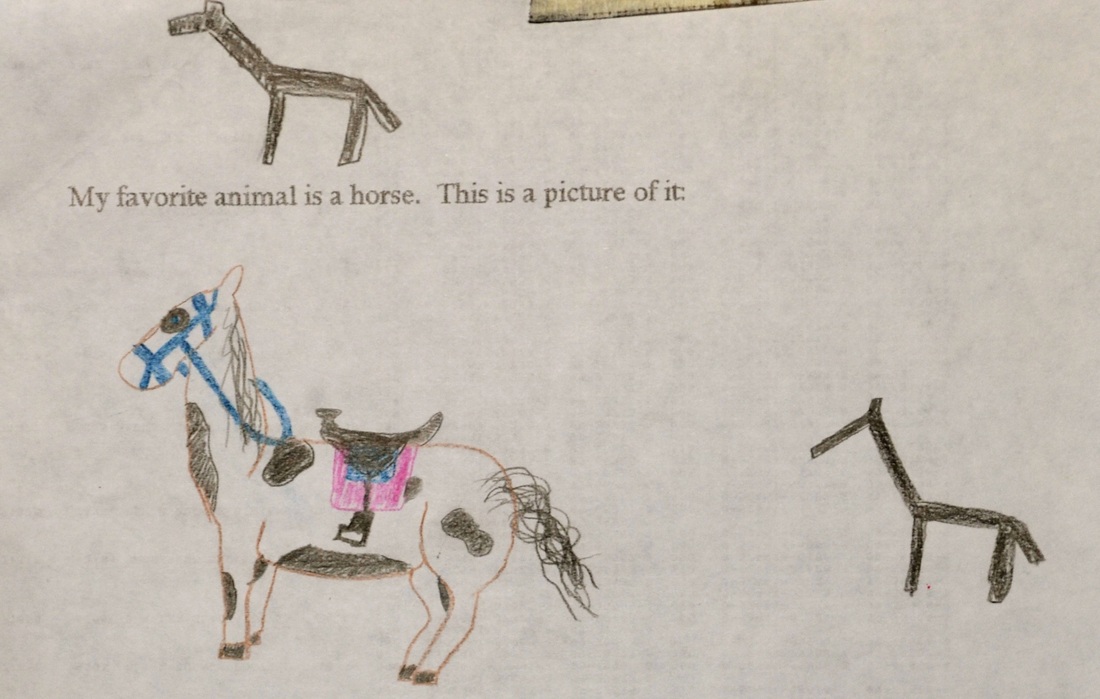
Here, I decided to give the horse a speech bubble. He says "Hacwl." I still don't know what I meant to say... Age 5 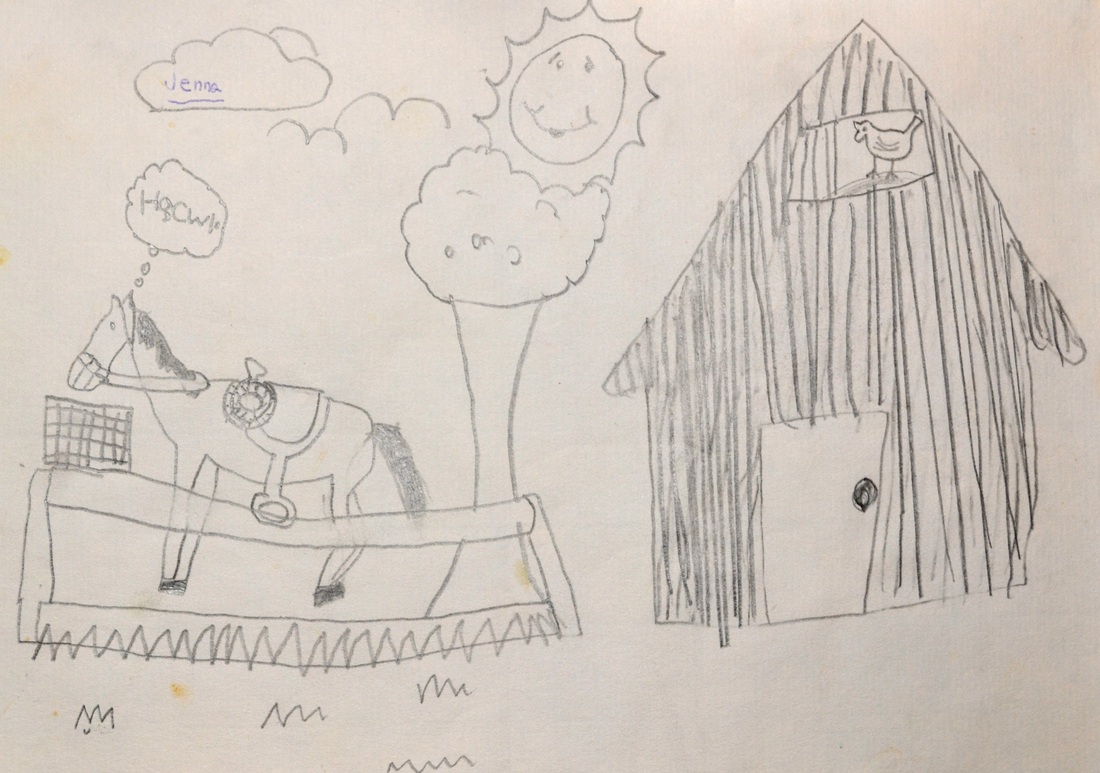
This began my love of Bays. Age 7 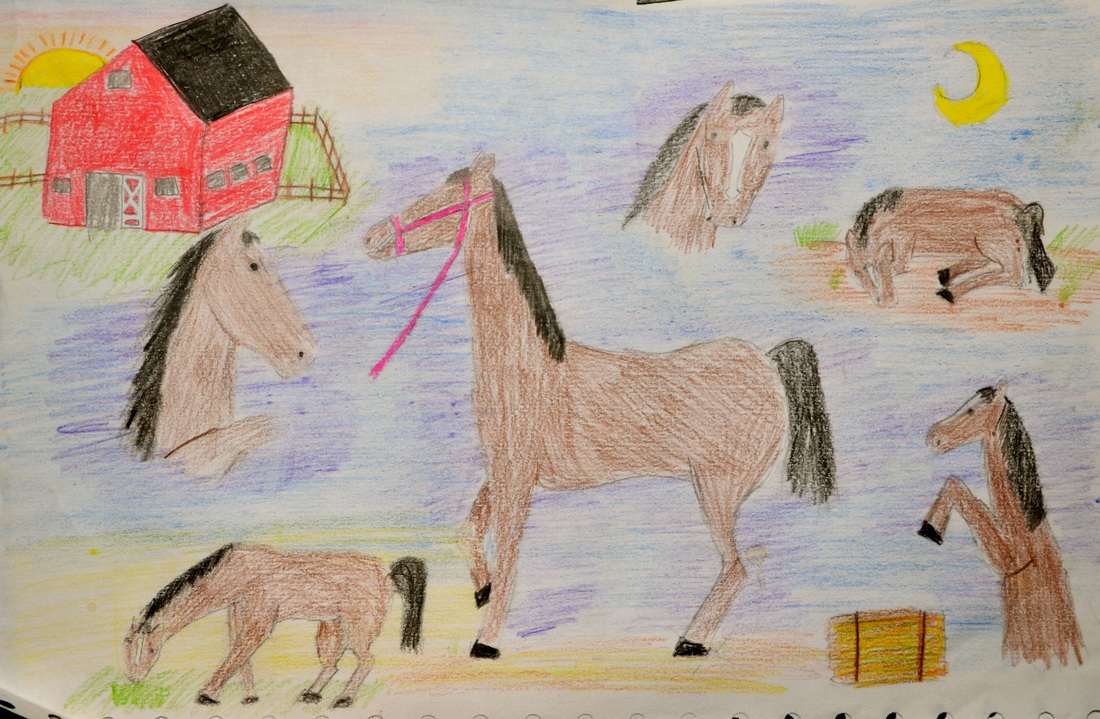
A red Appaloosa? Age 5 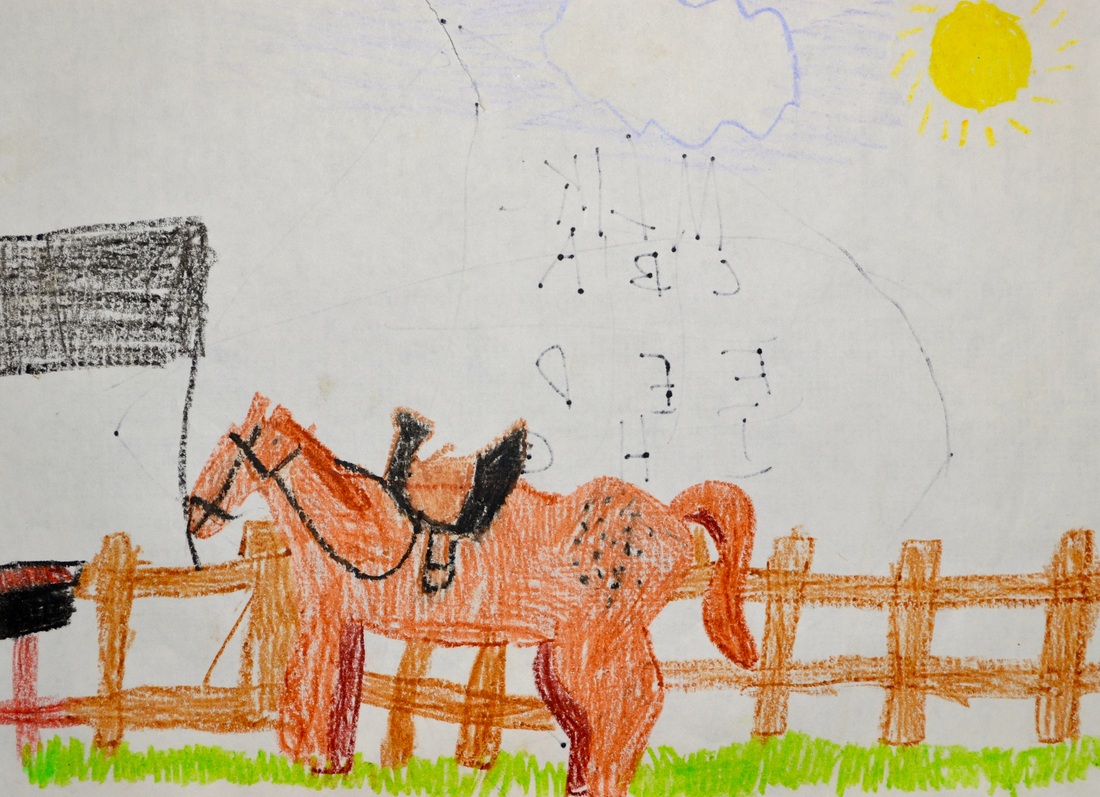
And last but not least, my horse with a dog tail ( I think...). Age 4 Fact: This is the only horse facing the right. 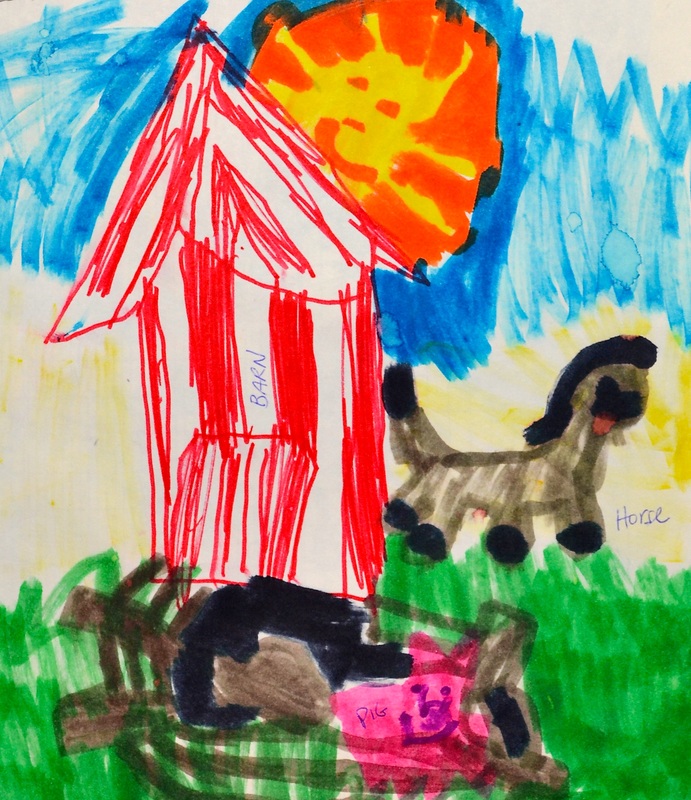
Twenty years later, I'm still wildly entertained by drawing. I'm still obsessed with horses. I still aspire to be a cowgirl.
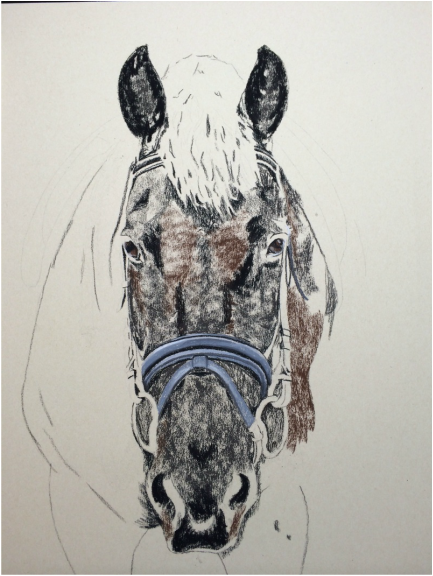
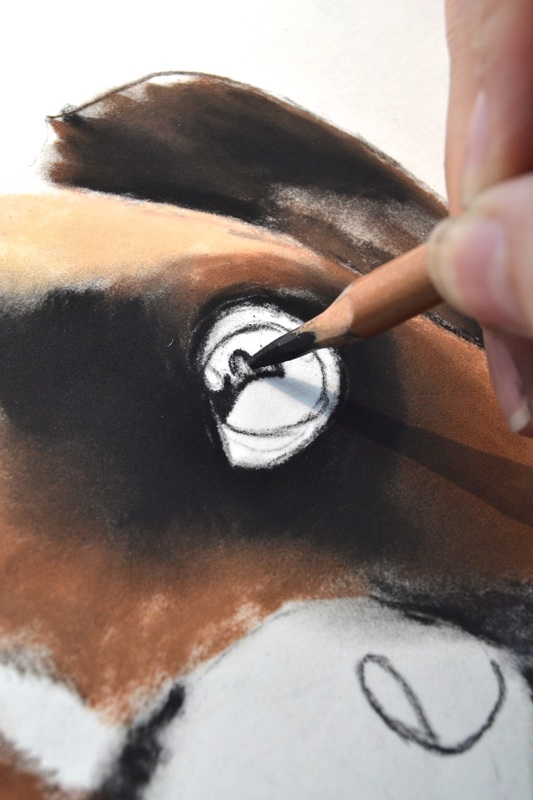
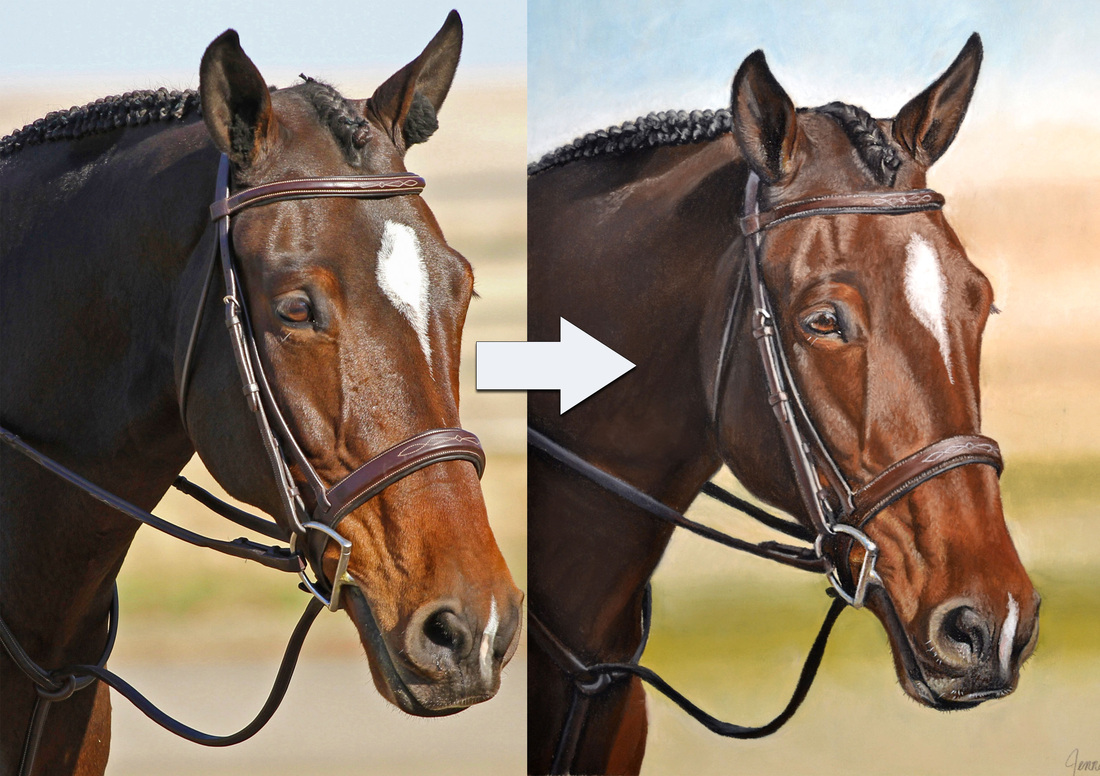
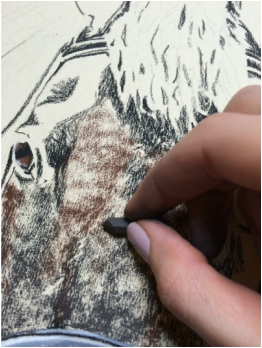
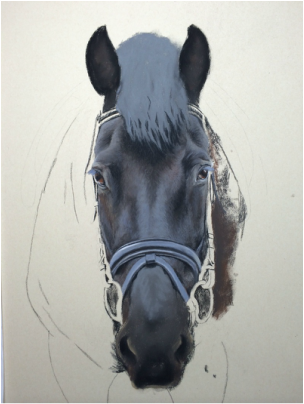
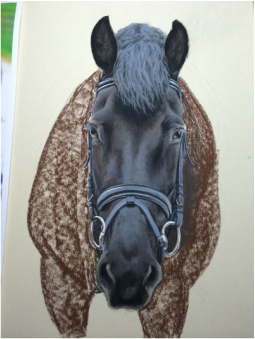
Oh yea, and I still draw all my horses facing the left. =P I titled this piece "Black on Black"...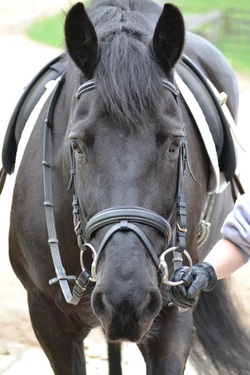 This was my reference photo that my client provided for me. Stunning photo I might add. Its very rare for me to receive a reference photo of a horse from this angle - straight on. Typically, it's not a very flattering view because the rest of the body because foreshortened and looks goofy when recreated in a portrait. I knew I would have to take some risks to bring this portrait to it's full potential. 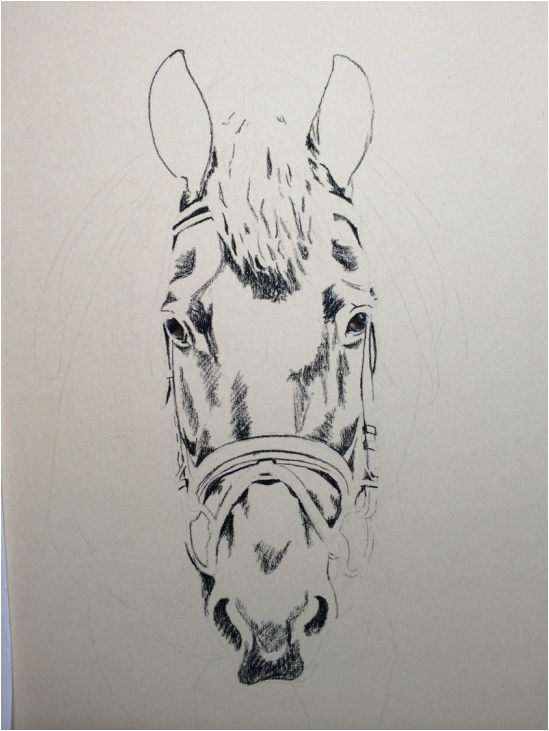
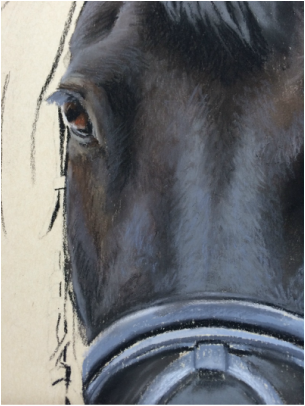
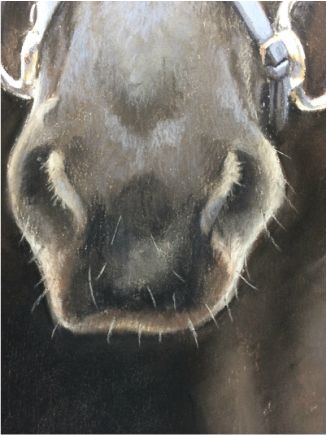
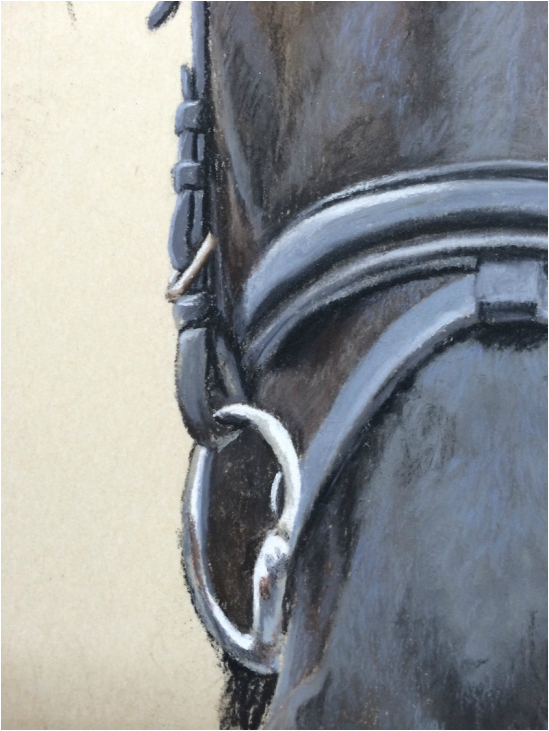 (Above) A close-up of the detail for the bridle and bit.
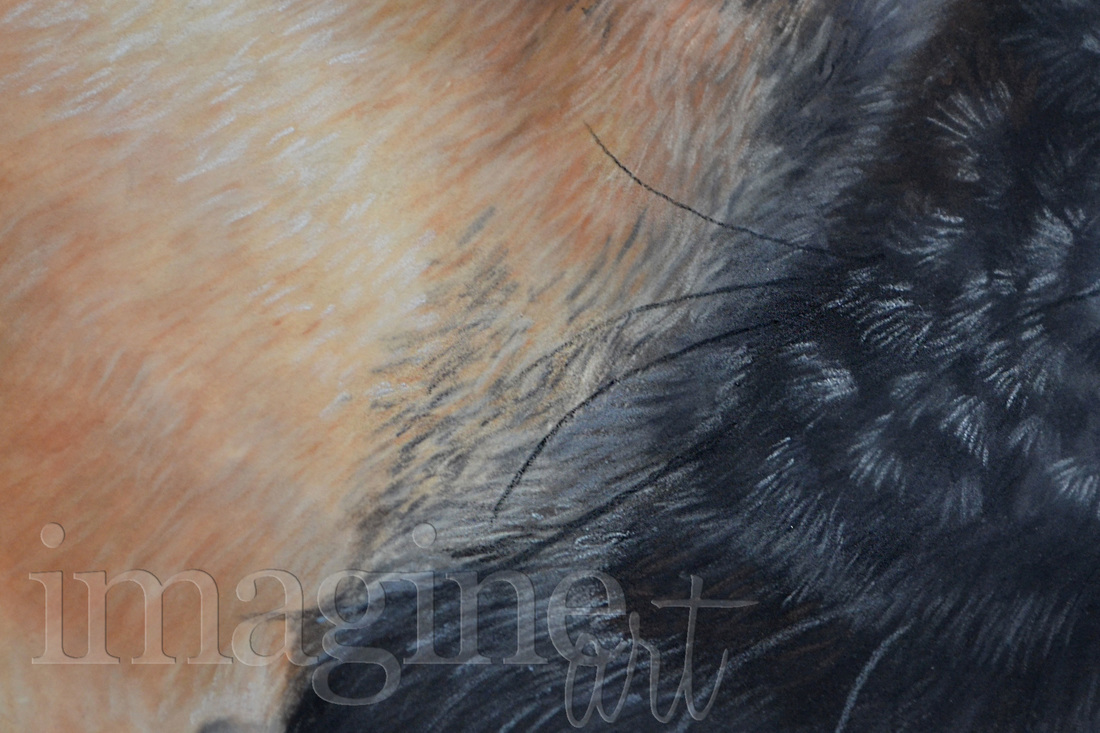
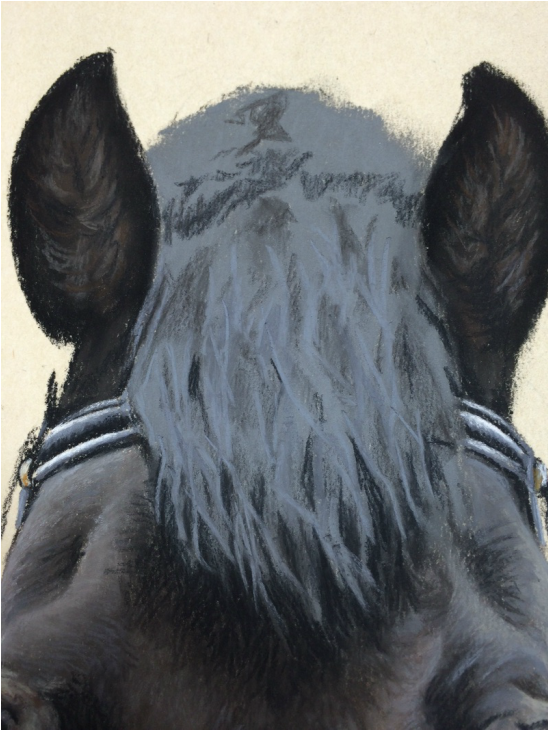
(Below) The last steps before filling in a background were the hair in the ears, forelock, and of course those lip whiskers. :)
The Final Portrait See how all those blues and browns stand out? 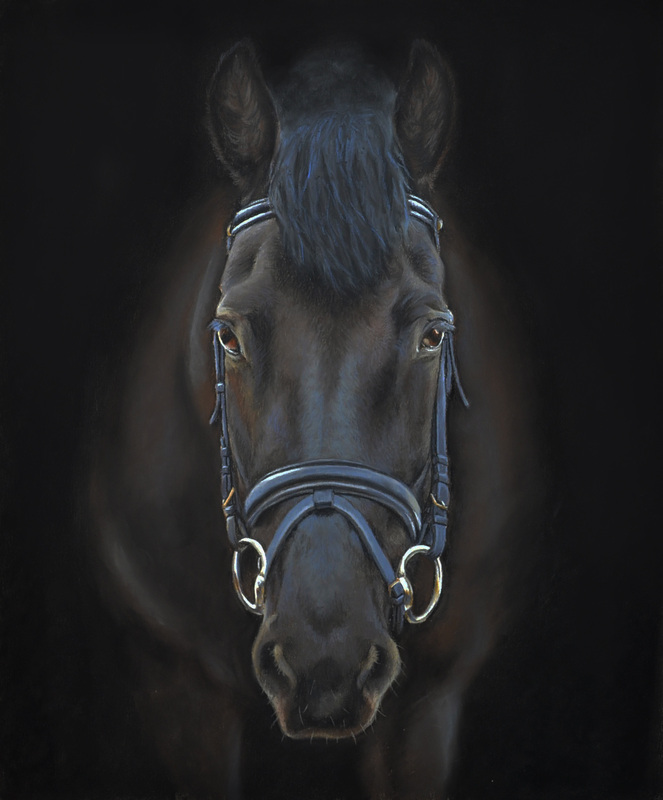 |
About me.
I eat, sleep, and breathe art. I'm fond of horses and put ketchup on everything. =] Archives
August 2016
Categories
All
|


 RSS Feed

203.525.5586
[email protected] |
"The likeness is superb, the detail is extraordinary, and the interpretation of his expression is magnificent. When I first saw the piece I was astounded - speechless to the point where I ran out of superlatives for the portrait." Read more....
|
|